Tools
Geekbench 6
A cross-platform benchmarking tool.
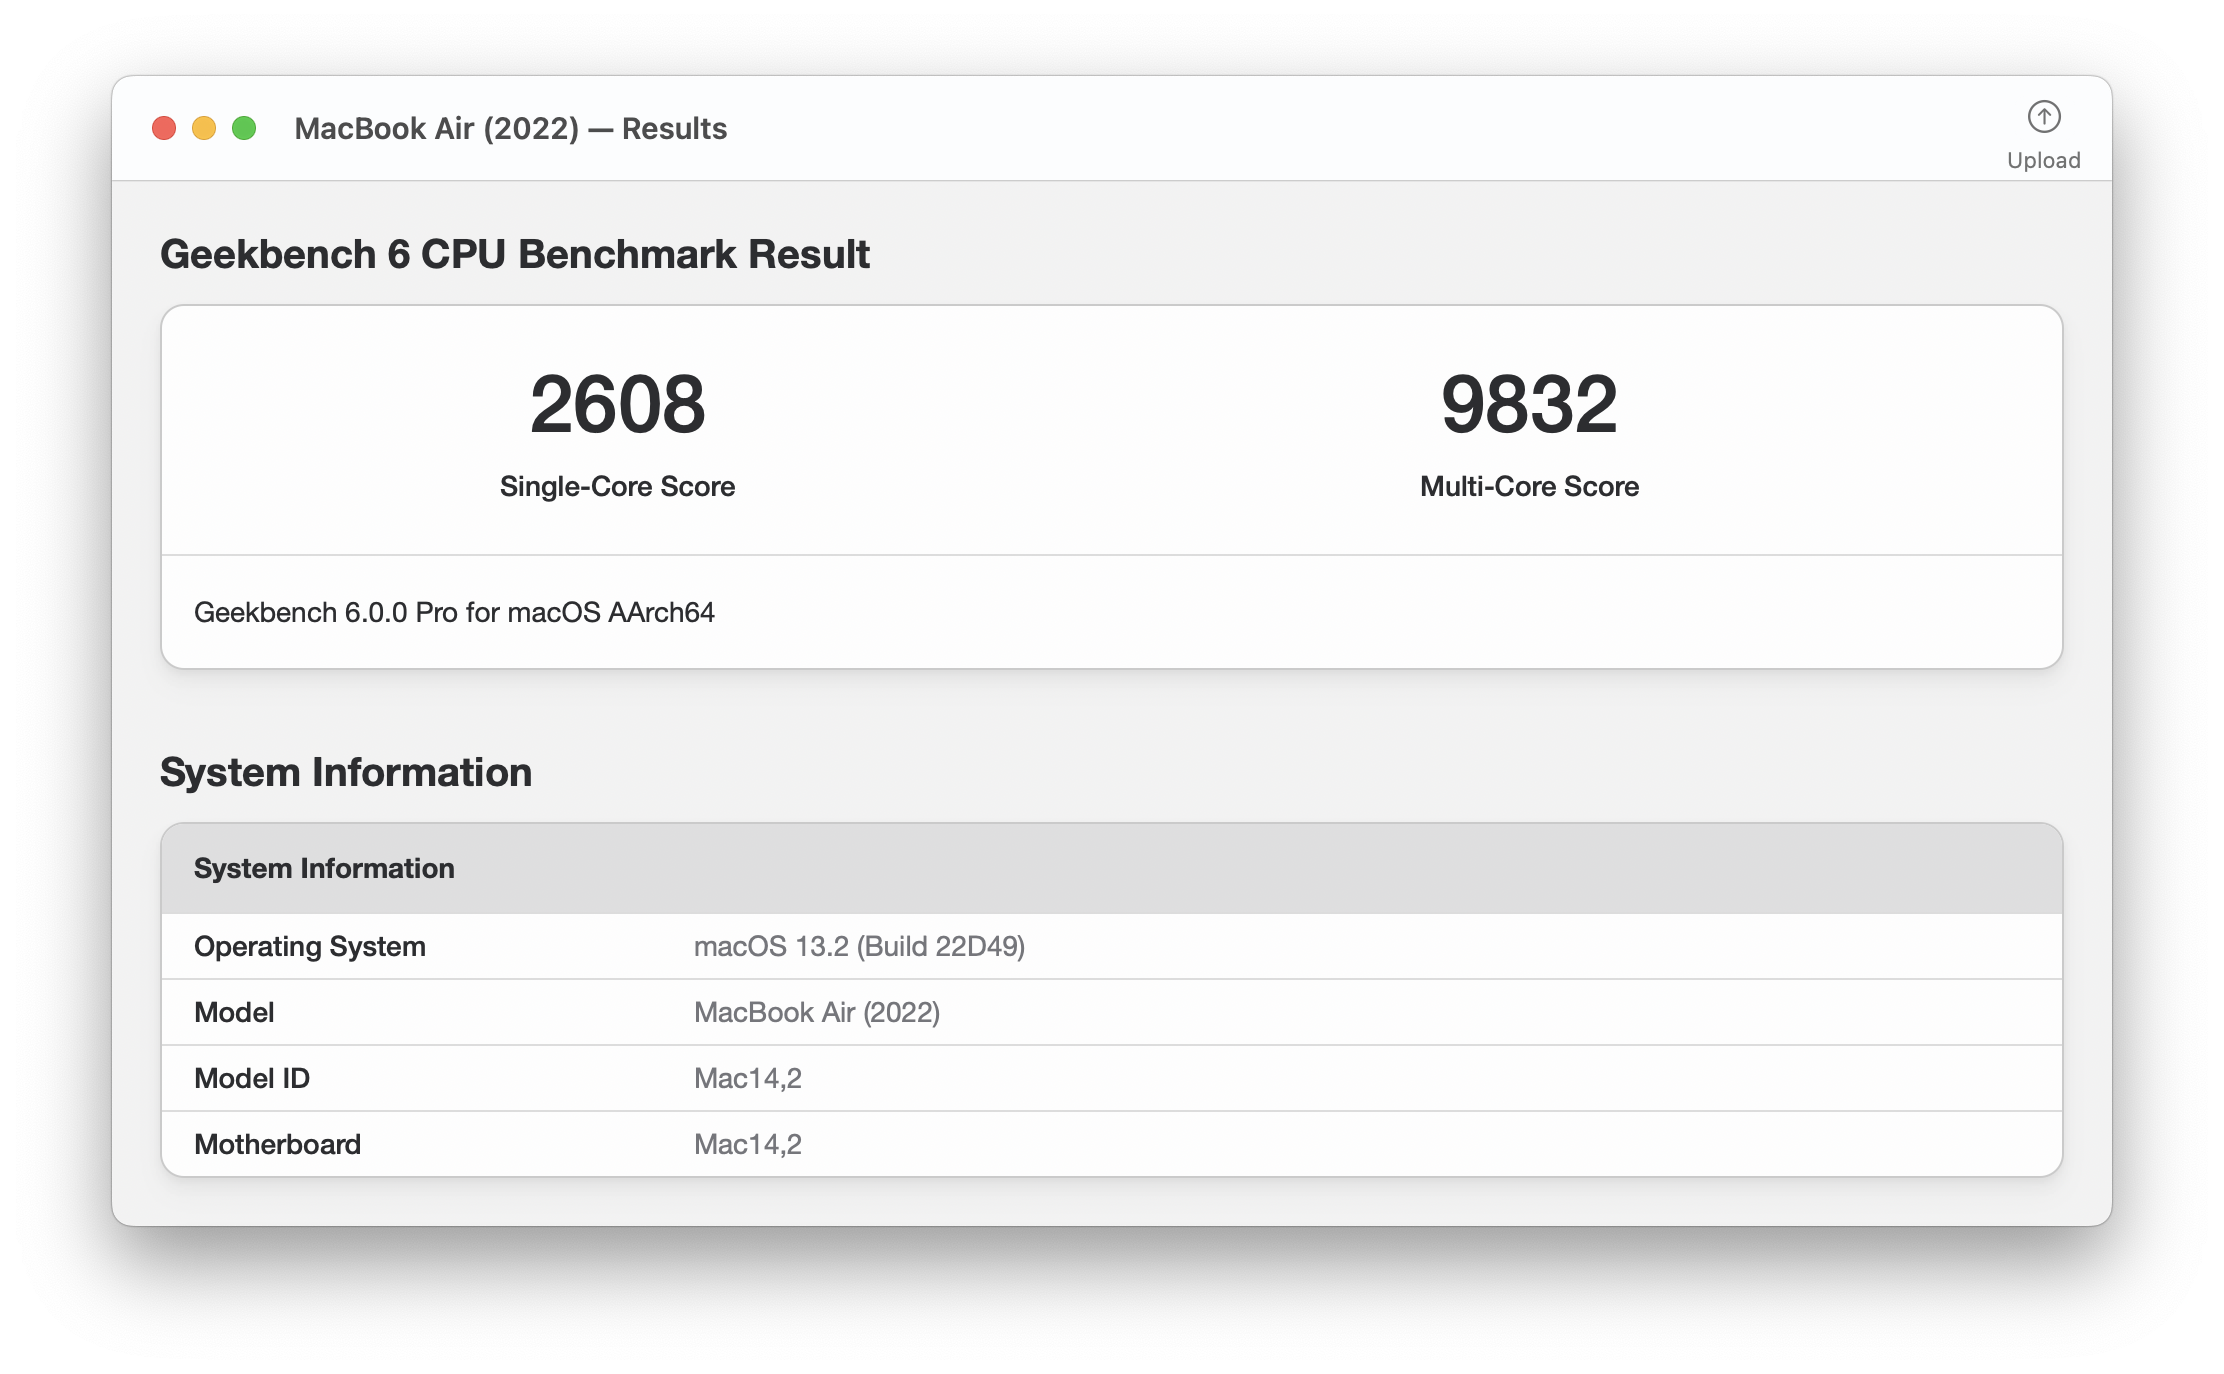
Download Geekbench 6 for Linux
paru -S geekbench
geekbench
FlClash
A cross-platform Clash.Meta client that is simple, open-source, and ad-free.
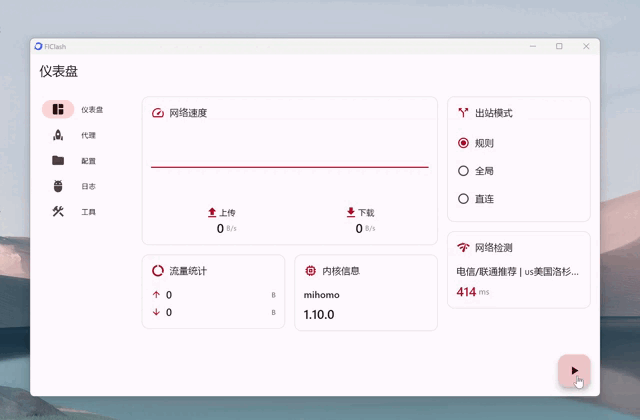
paru -S flclash-bin- If you mainly use
TUN,FlClashis the safer choice. In my own testing,Clash Vergestill caused very slowcodexinstallation inside IDEA AI Assistant even withTUNenabled, and the Codex login page in the terminal failed withToken exchange failed: token endpoint returned status 403 Forbidden. - After adding a subscription, click enable in the lower-right corner of the
Dashboard, or turn on auto-start inTools->Applications.
Clash Verge
A Tauri-based GUI for Clash Meta.

Releases · clash-verge-rev/clash-verge-rev
paru -S clash-verge-rev-bin- If the window opens to a blank white screen, search for
Clash Verge, right-clickEdit Applications..., and addWEBKIT_DISABLE_DMABUF_RENDERER=1underGeneral->Environment Variables.
Clash Party
A more user-friendly proxy client.
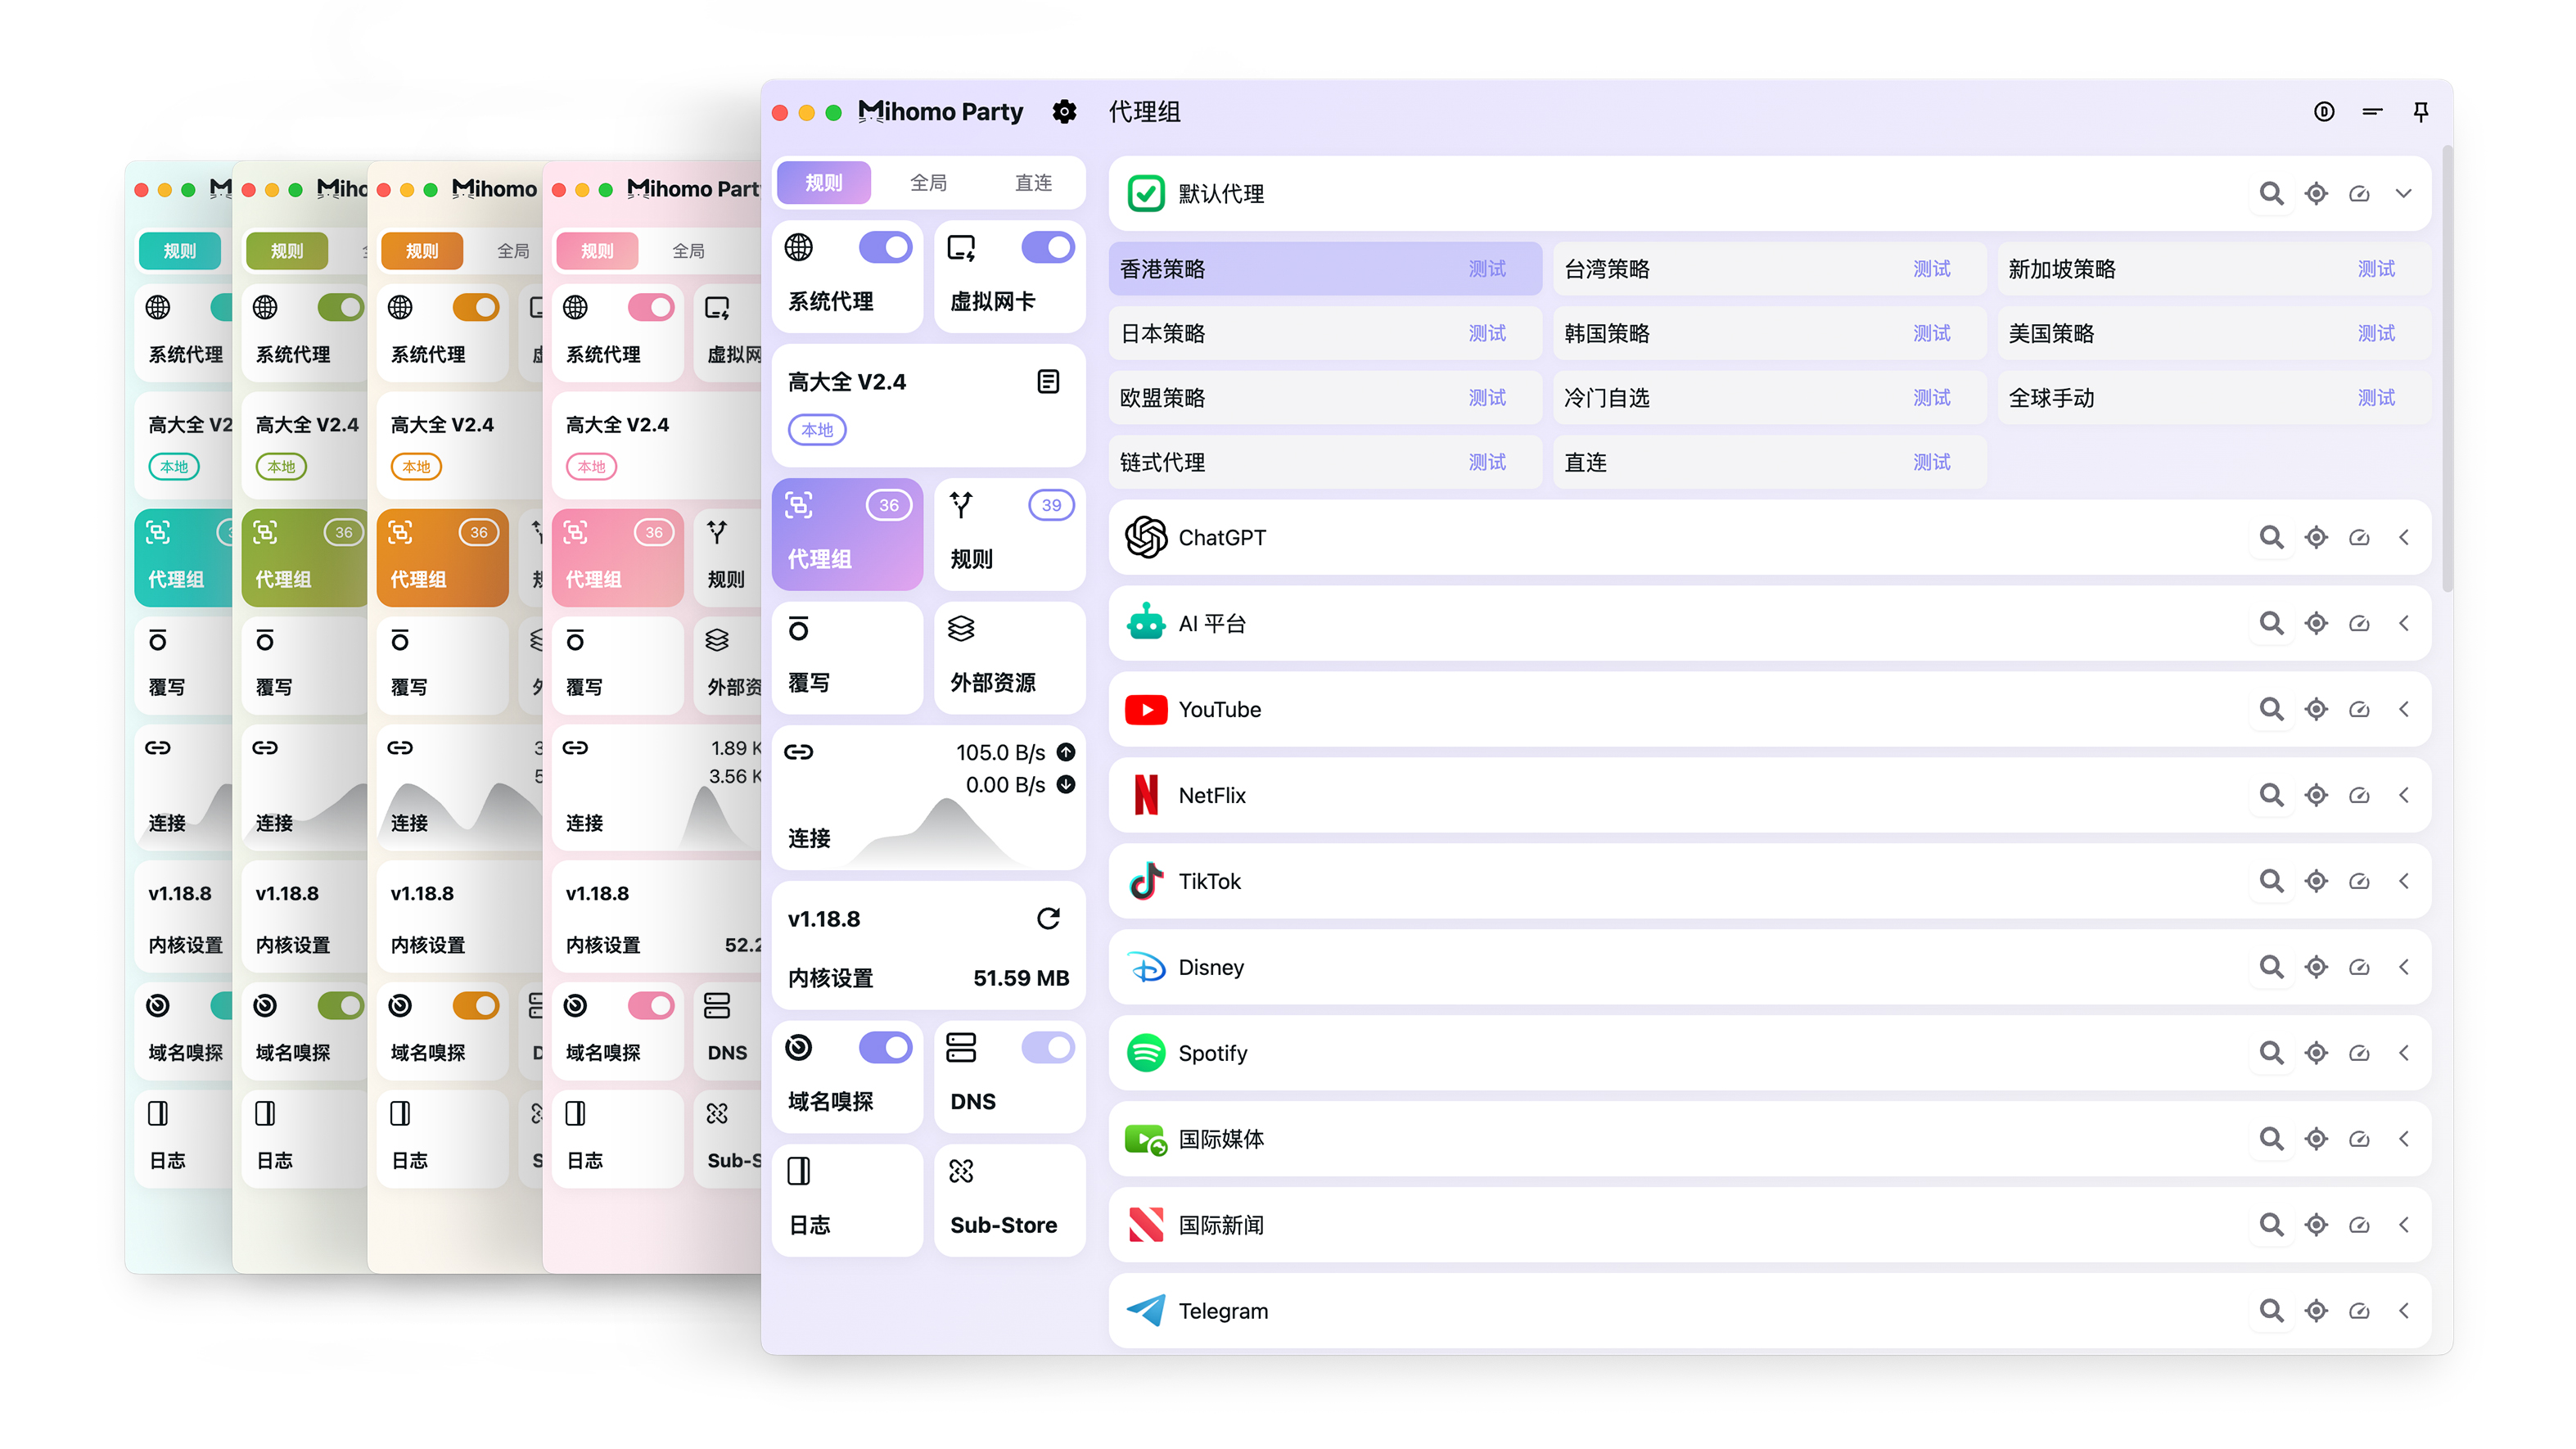
Releases · mihomo-party-org/clash-party
paru -S clash-party-binStelliberty
A modern Clash client built with Flutter and Rust, using a distinctive Material Design 3 visual style.
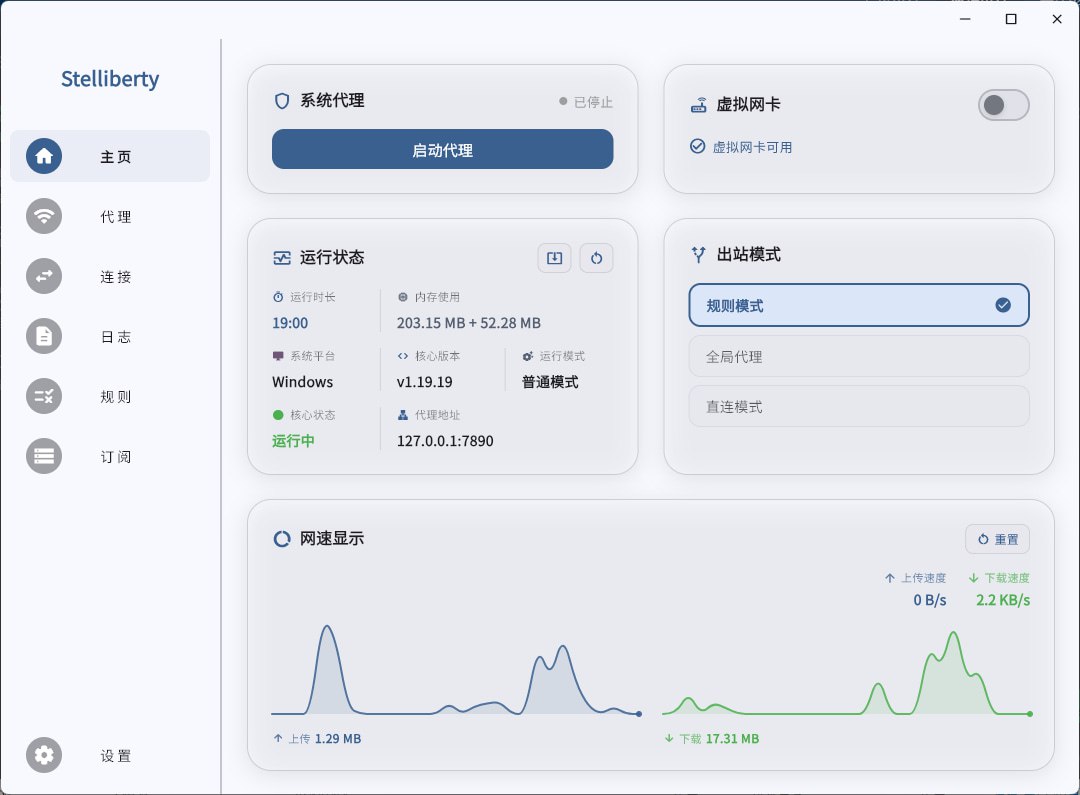
Kindness-Kismet/Stelliberty - GitHub
paru -S stelliberty-binClash Mi
An open-source mobile-oriented proxy tool with the Clash Mihomo core built in.
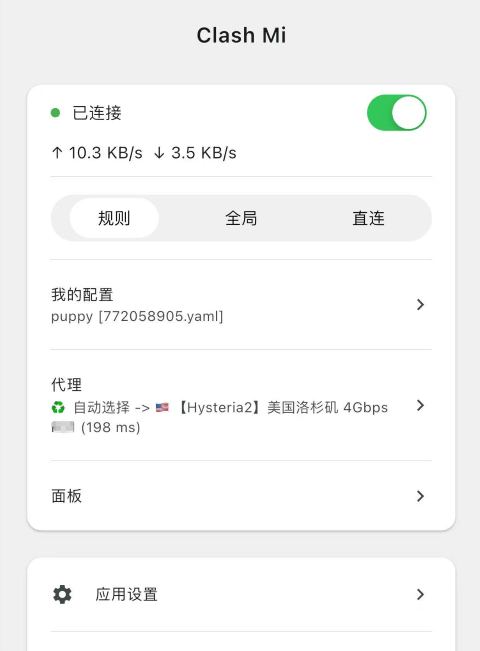
paru -S clash-miKoala Clash
A modern Electron-based GUI proxy client for Windows, macOS, and Linux.
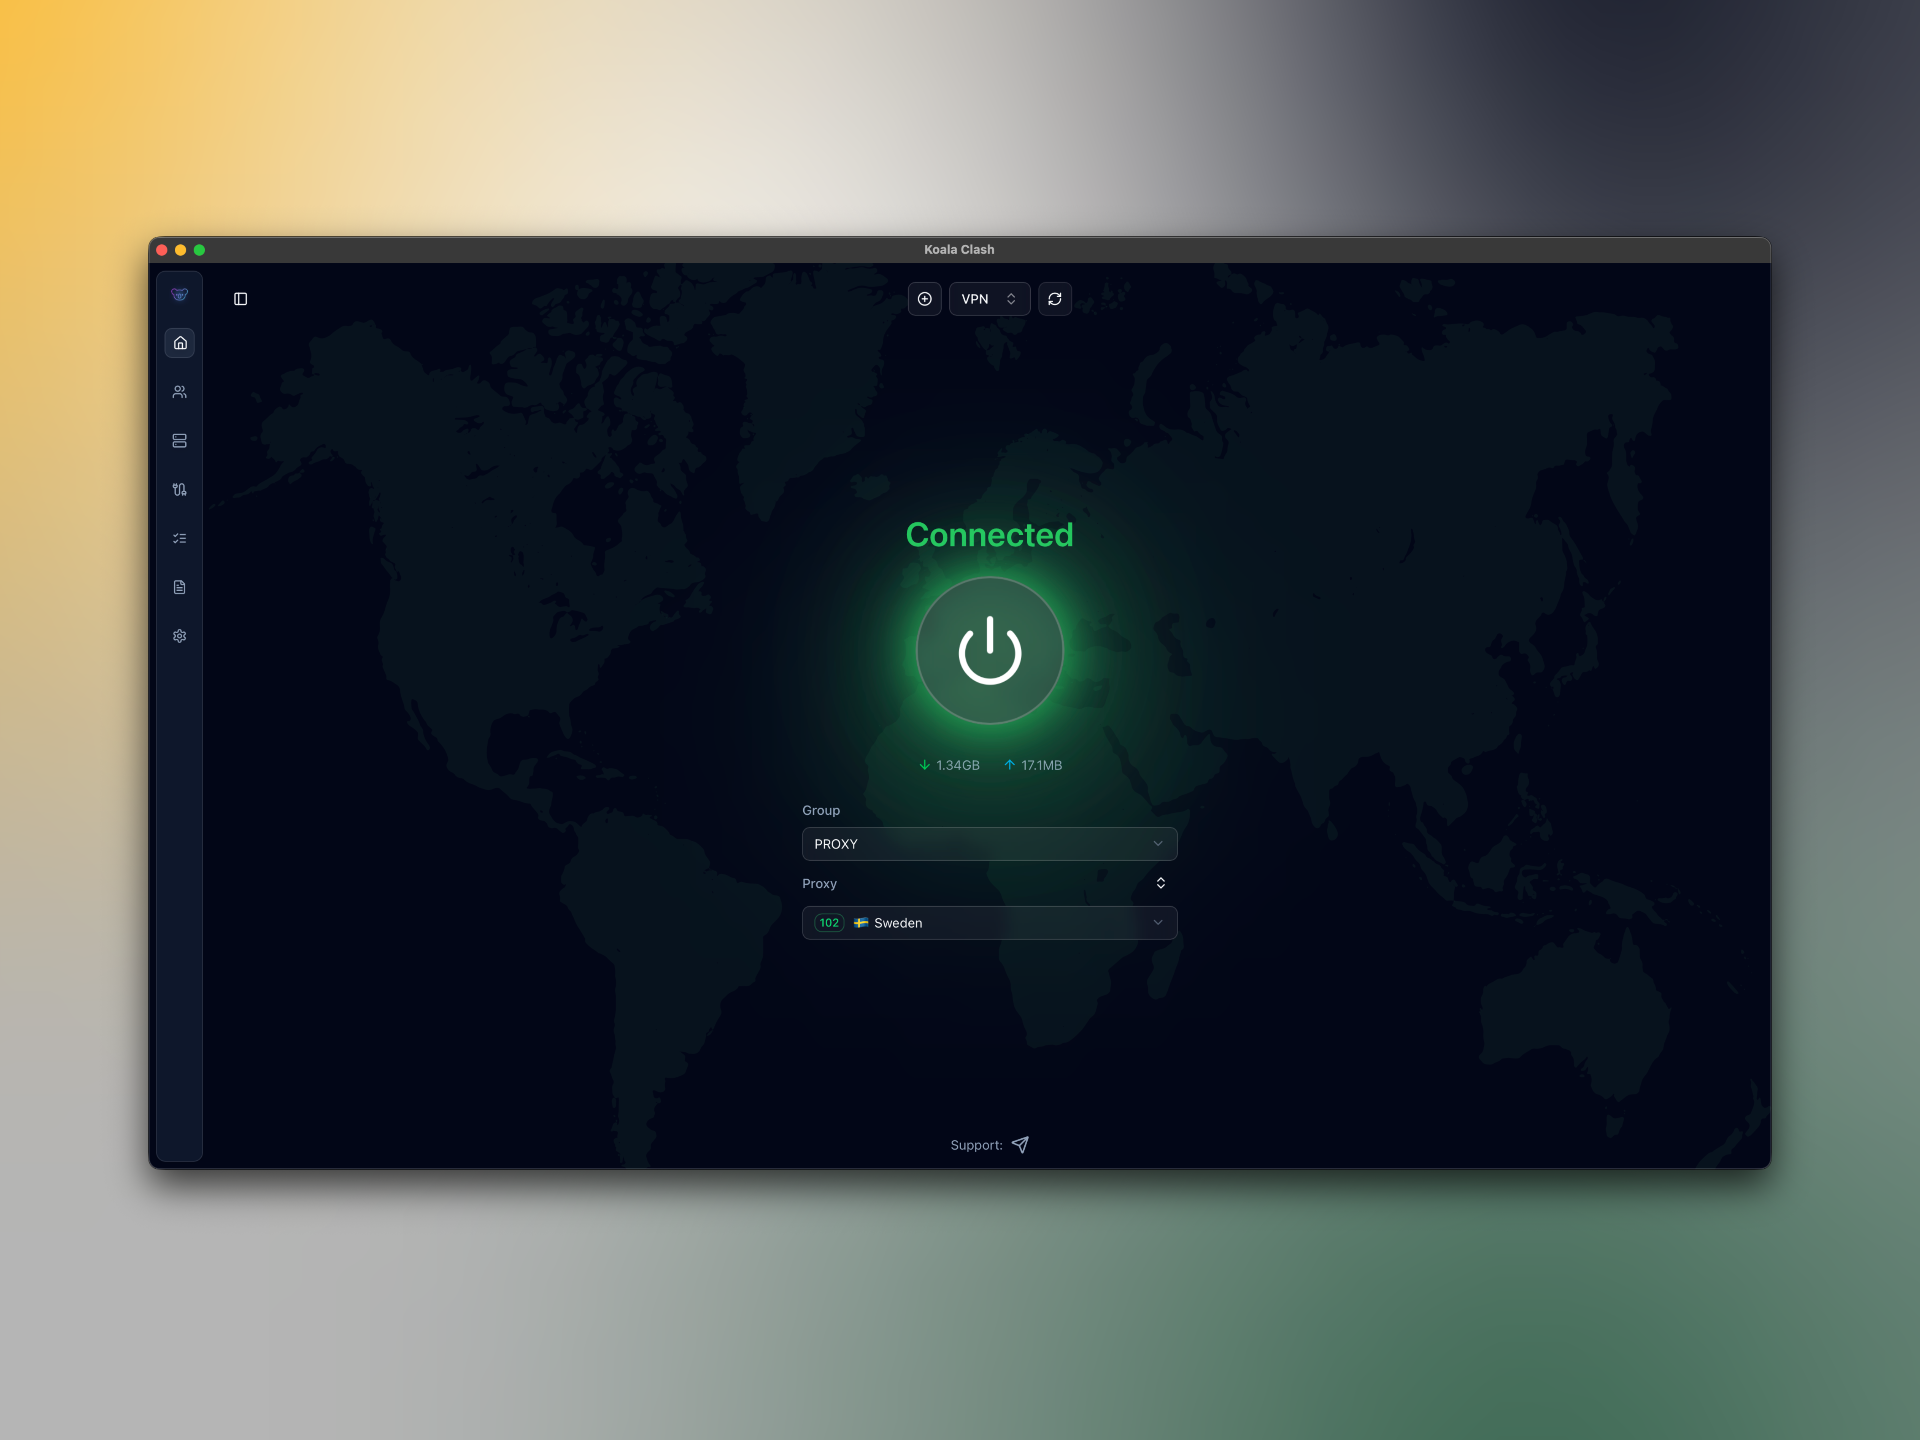
Releases · coolcoala/koala-clash
paru -S koala-clash-binproxychains
proxychains inserts a proxy chain between an application and the network, allowing traffic to be forwarded through the configured proxy server.
sudo pacman -S proxychainsEdit /etc/proxychains.conf, comment out the default entries after [ProxyList], and add your own:
sudo nano /etc/proxychains.conf[ProxyList]
socks5 127.0.0.1 7897nc
nc (netcat) is useful for checking TCP/UDP services, temporarily sending text, and debugging local or remote network services.
# Install
sudo pacman -S openbsd-netcat

# Verify after installation
nc -h

# Check whether a TCP service is reachable
nc -vz -w 2 127.0.0.1 22
nc -vz -w 2 example.com 80

# Local TCP send/receive test:
# Terminal 1: listen on 9000
nc -lv 127.0.0.1 9000
# Terminal 2: send text
echo "hello nc" | nc -N 127.0.0.1 9000

# Local UDP send/receive test:
# Terminal 1: listen on UDP 9001
nc -luv 127.0.0.1 9001
# Terminal 2: send text
echo "hello udp" | nc -u -w 1 127.0.0.1 9001
Brook
A cross-platform programmable networking tool that can also be used as a proxy.
# option 1: temporary proxy env vars
$ export http_proxy=127.0.0.1:7897
$ export https_proxy=127.0.0.1:7897
# option 2: prefix commands with proxychains -q

# install brook through nami
$ bash <(curl https://bash.ooo/nami.sh)
$ nami install brook
Server:
shell$ nano brook-server.sh #!/bin/bash pkill -f "brook wsserver" sleep 1 # -l listens on the port, -p is the password nohup brook wsserver -l :9999 -p 123456 > /dev/null & $ chmod +x brook-server.sh $ ./brook-server.shClient:
shell# create the brook helper script $ mkdir -p ~/.local/bin $ nano ~/.local/bin/brook.service.sh #!/bin/bash pids=$(ps aux | grep '[b]rook wsclient' | awk '{print $2}') if [ -n "$pids" ]; then for pid in $pids; do echo "Stopping brook wsclient process (PID: $pid)" kill "$pid" done else echo "No brook wsclient process found" fi /home/duanluan/.nami/bin/brook wsclient -s 1.2.3.4:9999 -p 123456 --socks5 127.0.0.1:1080 $ mkdir -p ~/.local/state/brook $ mkdir -p ~/.config/systemd/user $ nano ~/.config/systemd/user/brook.service [Unit] Description=A cross-platform programmable network tool. After=network.target [Service] ExecStart=/bin/bash %h/.local/bin/brook.service.sh Restart=always RestartSec=5 StandardOutput=null StandardError=null [Install] WantedBy=graphical-session.target $ systemctl --user daemon-reload $ systemctl --user enable brook $ systemctl --user start brook $ systemctl --user status brook
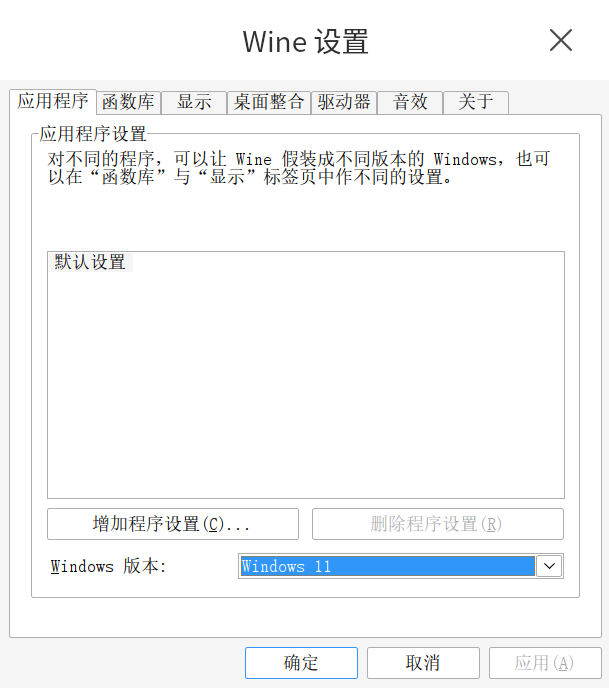
Wine
Wine runs Windows applications by providing compatible Win32 APIs instead of emulation or virtualization.
sudo pacman -Syu wine wine-mono wine-gecko winetrickswine-mono: lets Wine run .NET-based applicationswine-gecko: provides the HTML engine used by some appswinetricks: helper script for installing common components
# set a dedicated Wine prefix, otherwise ~/.wine is used
export WINEPREFIX=~/.wine-xxx
# initialize the prefix
winecfg
# install Chinese font support
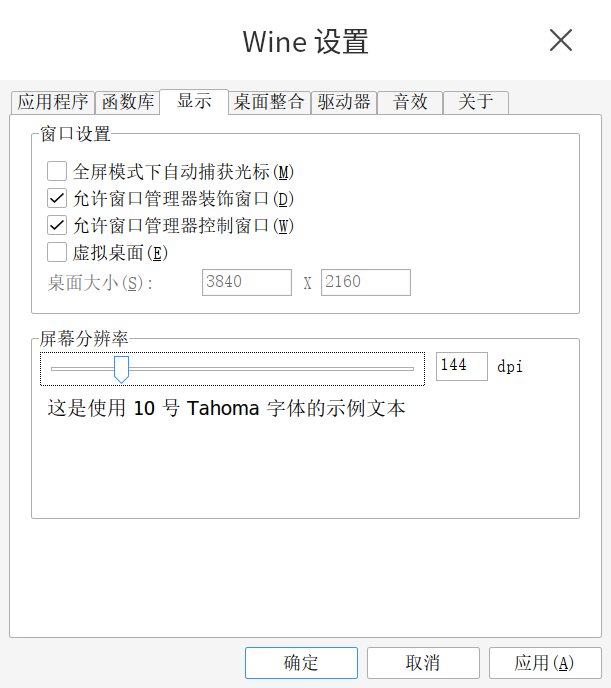
proxychains -q winetricks cjkfontsIn Wine settings, you can switch the Windows Version under Applications, and increase the Screen Resolution under Graphics.
Proton-GE-Custom
Proton-GE is the "Swiss army knife" version of Proton. If the official Proton build on Linux or Steam Deck cannot run a game, or if cutscenes stay black, Proton-GE often fixes it.
paru -S proton-ge-custom-binWine Runner
Wine Runner is a graphical wrapper around Wine, aimed at making Windows applications easier to run on Linux. It adds GUI-based Wine management, installers, app-store style integrations, helper tools, and runtime installers.

Install Wine Runner from Spark Store.
VMware Workstation Pro
VMware Workstation Pro is a powerful virtualization platform for creating and running multiple virtual machines on one physical host.
How to download and install VMware Workstation Pro on Linux
Register a Broadcom account, using your email as the login name.
Then download the Linux build by searching for VMware Workstation Pro on the Broadcom Free Downloads Portal.
# option 1
chmod u+x VMware-Workstation-Full-17.6.3-24583834.x86_64.bundle
sudo ./VMware-Workstation-Full-17.6.3-24583834.x86_64.bundle

# option 2
paru -S vmware-keymaps vmware-workstation
Choose No for VMware's Customer Experience Improvement Program if you do not want to participate.
Install open-vm-tools inside guests to improve integration:
shellsudo pacman -S open-vm-toolsCould not connect 'Ethernet0' to virtual network '/dev/vmnet8'shellsudo systemctl enable --now vmware-networksFail Network configuration is missing. Ensure that /etc/vmware/networking existsshellsystemctl enable --now vmware-networks-configuration.service
VirtualBox
VirtualBox is an open-source virtualization solution for creating and running VMs across platforms.
Oracle VirtualBox Linux DownloadsOracle VirtualBox Downloads
# inspect the current kernel version
$ uname -r
6.12.48-1-MANJARO

# install VirtualBox and choose the module package matching your kernel
$ sudo pacman -S virtualbox
:: There are 14 providers available for VIRTUALBOX-HOST-MODULES:
:: Repository extra
   1) linux510-virtualbox-host-modules  2) linux515-virtualbox-host-modules
   3) linux54-virtualbox-host-modules  4) linux61-rt-virtualbox-host-modules
   5) linux61-virtualbox-host-modules  6) linux612-rt-virtualbox-host-modules
   7) linux612-virtualbox-host-modules  8) linux615-rt-virtualbox-host-modules
   9) linux616-rt-virtualbox-host-modules  10) linux616-virtualbox-host-modules
   11) linux617-virtualbox-host-modules  12) linux66-rt-virtualbox-host-modules
   13) linux66-virtualbox-host-modules  14) virtualbox-host-dkms
Enter a number (default=1): 7

# load the driver, otherwise you may see "Kernel driver not installed (rc=-1908)"
$ sudo modprobe vboxdrv

# install the extension pack (optional but recommended for USB 2.0/3.0, RDP, etc.)
paru -S virtualbox-ext-oracle
Cannot enumerate USB devicesshellsudo usermod -aG vboxusers $USERReboot afterwards.
USB devices do not appearshell# create the usbfs group if needed sudo groupadd usbfs # add the user to both groups sudo usermod -aG vboxusers $USER sudo usermod -aG usbfs $USERReference: How to enable USB in VirtualBox
VirtualBox can't enable the AMD-V extensionshell# unload the KVM modules sudo rmmod kvm_amd sudo rmmod kvm # blacklist them echo "blacklist kvm" | sudo tee /etc/modprobe.d/blacklist.conf echo "blacklist kvm_amd" | sudo tee -a /etc/modprobe.d/blacklist.conf sudo update-initramfs -uReference: VirtualBox can't enable the AMD-V extension
Cannot register the hard disk 'xxx.vdi' {new_uuid} because a hard disk 'xxx.vdi' with UUID {old_uuid} already existsshellvboxmanage closemedium disk old_uuidReference: Fix "a hard disk with UUID already exists" in VirtualBox
VT-x is being used by another hypervisor (VERR_VMX_IN_VMX_ROOT_MODE)VirtualBox can't operate in VMX root mode. Please disable the KVM kernel extension, recompile your kernel and reboot (VERR_VMX_IN_VMX_ROOT_MODE).The KVM (Kernel-based Virtual Machine) modules built into the Linux kernel have taken over the CPU virtualization extensions (VT-x / AMD-V), so VirtualBox cannot enter VMX Root Mode.
shell# Check whether KVM modules are already loaded lsmod | grep -E '^(kvm|kvm_intel|kvm_amd)' # If no QEMU / libvirt / GNOME Boxes / Android Emulator process that depends on KVM is running, # temporarily unload the KVM modules before starting VirtualBox # Intel CPU sudo modprobe -r kvm_intel kvm # AMD CPU sudo modprobe -r kvm_amd kvm # If KVM is automatically loaded after every reboot following a system upgrade, # and this machine mainly uses VirtualBox, add KVM to the module blacklist sudo tee /etc/modprobe.d/disable-kvm-for-virtualbox.conf > /dev/null <<'EOF' blacklist kvm blacklist kvm_intel blacklist kvm_amd EOF # Regenerate initramfs boot images for all installed kernels sudo mkinitcpio -P # Reboot sudo reboot # If you later need to use QEMU / libvirt / GNOME Boxes / Android Emulator again sudo rm /etc/modprobe.d/disable-kvm-for-virtualbox.conf sudo mkinitcpio -P sudo reboot
Docker + Buildx + Compose + lazydocker + Portainer
Docker + Docker Buildx + Docker Compose
shell# install Docker, Buildx, and Compose sudo pacman -Syu --noconfirm docker docker-buildx docker-compose # enable Docker on boot and start it now sudo systemctl enable --now docker # add the current user to the docker group sudo usermod -aG docker $USERInstall Portainer CE | Portainer Documentation
For mirror acceleration, see: Docker notes, FAQ, and WSL2-related items
lazydocker
A simple terminal UI for Docker and docker-compose.
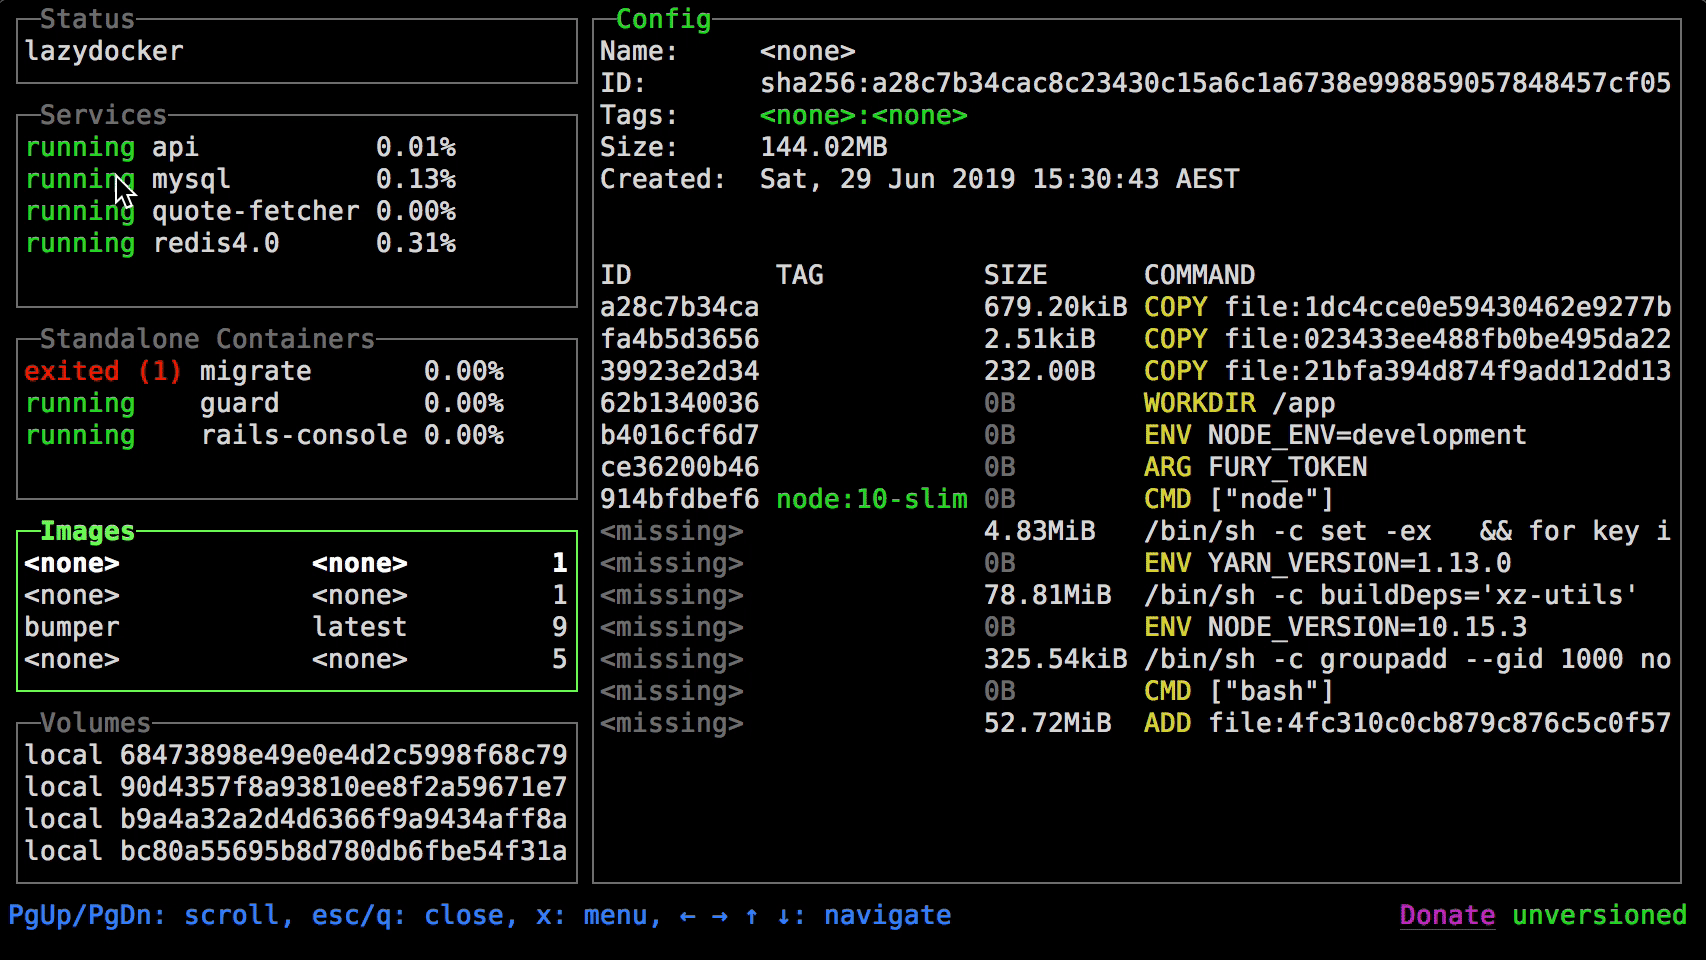 Releases · jesseduffield/lazydockershell
paru -S lazydocker-binPortainer
A web-based Docker management panel.
Releases · portainer/portainer
shell# create the volume used by Portainer sudo docker volume create portainer_data # start Portainer proxychains sudo docker run -d -p 8000:8000 -p 9443:9443 --name portainer --restart=always -v /var/run/docker.sock:/var/run/docker.sock -v portainer_data:/data portainer/portainer-ce:ltsOpen https://localhost:9443/ to initialize the admin account.
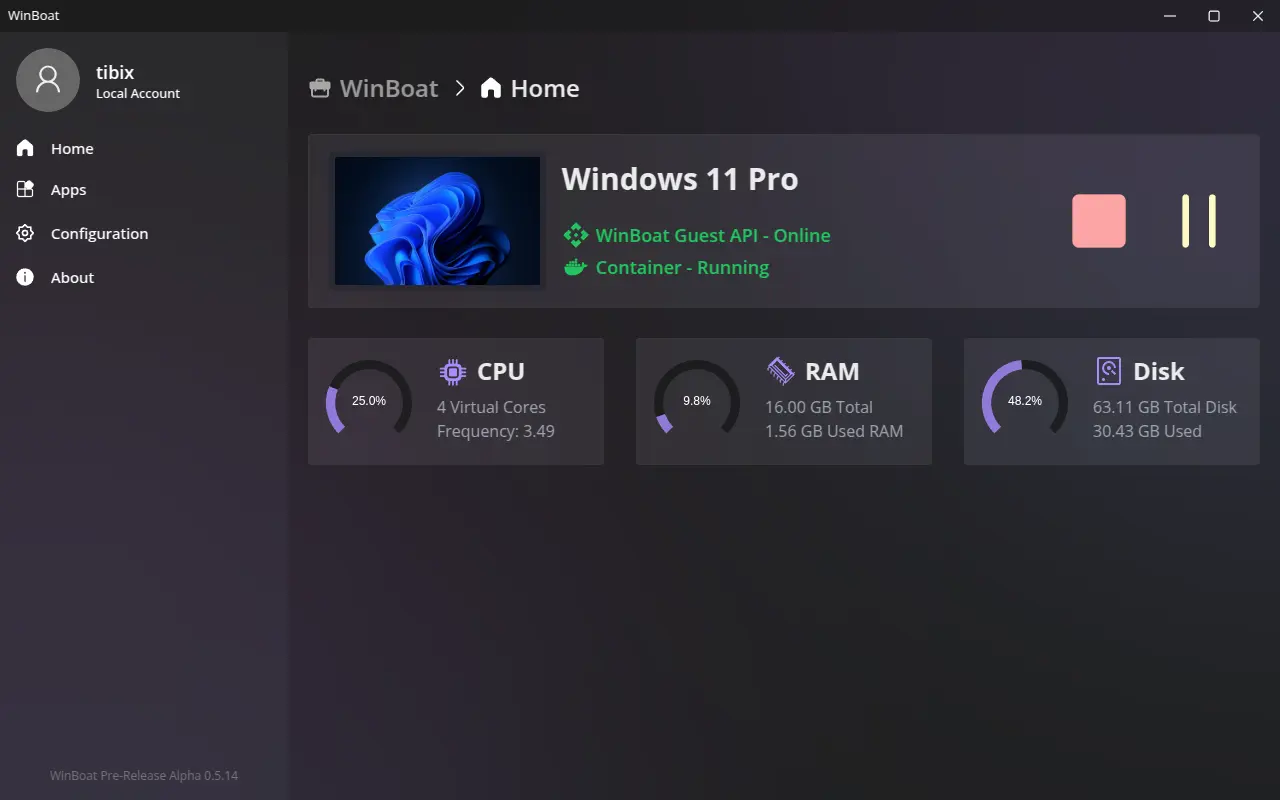
WinBoat
Run Windows applications on Linux with seamless integration.
WinBoat - Run Windows Apps on Linux with Seamless Integration
# install WinBoat
paru -S winboat-bin
WinBoat prerequisites
Enable virtualization in BIOS (SVM / VT-x)
The exact path differs by motherboard. Usually you enter BIOS by repeatedly pressing
F2orDelduring boot, or by runningsystemctl reboot --firmware-setupin the terminal. Then find the CPU virtualization setting and enableSVM Mode (AMD)orIntel Virtualization Technology.Docker
Install and enable it using the Docker section above.
FreeRDP
shellsudo pacman -S freerdpConfigure user permissions
shell# create the kvm group if needed sudo groupadd -f kvm # add the current user to docker and kvm sudo usermod -aG docker $USER sudo usermod -aG kvm $USER # refresh udev permissions sudo udevadm trigger # reboot so the group changes take effect sudo rebootInstall Docker Compose v2 manually
WinBoat requires Compose v2. At the time of writing, the last v2 release is
v2.40.3.shell# create the Docker CLI plugin directory mkdir -p ~/.docker/cli-plugins # download the official binary curl -SL https://github.com/docker/compose/releases/download/v2.40.3/docker-compose-linux-x86_64 -o ~/.docker/cli-plugins/docker-compose # make it executable chmod +x ~/.docker/cli-plugins/docker-compose # verify $ docker compose version Docker Compose version v2.40.3Force-load the KVM kernel module
shell# load the module immediately; replace kvm_amd with kvm_intel on Intel CPUs sudo modprobe kvm_amd # persist it across reboots echo "kvm_amd" | sudo tee /etc/modules-load.d/winboat_kvm.conf # reboot to be safe sudo rebootFinal verification and system install
shell# make sure the user belongs to docker and kvm $ groups # check the KVM module $ lsmod | grep kvm kvm_amd 241664 4 kvm 1384448 3 kvm_amd irqbypass 12288 1 kvm ccp 184320 1 kvm_amdRestart WinBoat, confirm that all startup checks pass, then follow the prompts to install the Windows image.
Custom ISO installation
Note: this route did not end up fully stable in my testing. WinBoat Guest API kept switching between working and offline, and clicking Apps did nothing.
In WinBoat, and in most Windows containers based on QEMU/KVM, the default disk controller is VirtIO. Many stripped-down Windows ISOs do not include VirtIO drivers, so the installer cannot see the disk.
The solution is to inject VirtIO drivers into the ISO.
# -----------------------------------------------------------------------------
# Step 1: prepare the environment and download the drivers
# Install the extraction tools, ISO packaging tools, and DOS utilities needed
# to create a UEFI boot image manually. Then fetch the latest VirtIO drivers.
# -----------------------------------------------------------------------------

# 1. Install the required tools
sudo pacman -S p7zip libisoburn mtools dosfstools

# 2. Create the workspace
mkdir -p ~/win11_mod/drivers
cd ~/win11_mod

# 3. Download the VirtIO driver ISO
wget https://fedorapeople.org/groups/virt/virtio-win/direct-downloads/stable-virtio/virtio-win.iso

# 4. Extract the required drivers
# We only need the Windows 11 amd64 drivers:
# - NetKVM: network adapter
# - viostor: storage controller
# - vioscsi: SCSI controller
7z x virtio-win.iso -o./temp_drivers
cp -r temp_drivers/NetKVM/w11/amd64/* ./drivers/
cp -r temp_drivers/viostor/w11/amd64/* ./drivers/
cp -r temp_drivers/vioscsi/w11/amd64/* ./drivers/

# 5. Clean up
rm -rf temp_drivers virtio-win.iso


# -----------------------------------------------------------------------------
# Step 2: unpack the Windows ISO and inject the drivers
# -----------------------------------------------------------------------------

# 1. Create the output directory
mkdir -p ~/win11_mod/iso_content

# 2. Extract the Windows ISO
# Important: the -o option for 7z must be immediately followed by the path.
# Do not use ~ after -o; use an absolute path.
7z x "/home/duanluan/Downloads/clean-win11.iso" -o/home/duanluan/win11_mod/iso_content

# 3. Copy the drivers directory into the extracted ISO root
cp -r ~/win11_mod/drivers ~/win11_mod/iso_content/


# -----------------------------------------------------------------------------
# Step 3: rebuild the UEFI boot image
# Many slimmed-down ISOs remove the optical-boot files.
# WinBoat cannot boot them unless we manually rebuild efisys.bin.
# -----------------------------------------------------------------------------

# 1. Create an empty 2.88 MB image file
dd if=/dev/zero of=efisys.bin bs=1024 count=2880
# 2. Format it as FAT12
mkfs.vfat efisys.bin
# 3. Build the EFI directory structure inside it
mmd -i efisys.bin ::/EFI
mmd -i efisys.bin ::/EFI/BOOT
# 4. Copy bootx64.efi into the boot image
mcopy -i efisys.bin iso_content/EFI/BOOT/bootx64.efi ::/EFI/BOOT/BOOTX64.EFI
# 5. Move the finished boot image into the ISO content directory
mv efisys.bin ./iso_content/


# -----------------------------------------------------------------------------
# Step 4: repack the ISO
# -----------------------------------------------------------------------------

xorriso -as mkisofs \
  -iso-level 4 \
  -J -l -R \
  -D \
  -V "WIN11_VIRTIO" \
  -o ./win11_final.iso \
  -e efisys.bin \
  -no-emul-boot \
  -isohybrid-gpt-basdat \
  ./iso_content

# The resulting file is ./win11_final.iso
When installing WinBoat, select ~/win11_mod/win11_final.iso. In the Installation screen, click in your browser to open QWMU (windows) - noVNC.
If Windows setup cannot see the disk, click Load driver, choose D:\drivers, then select Red Hat VirtIO SCSI pass-through controller.
After Windows reaches the desktop, open Device Manager, find the Ethernet Controller with the yellow warning icon, update the driver manually from D:\drivers, and install Red Hat VirtIO Ethernet Adapter.
In Windows, open https://github.com/TibixDev/winboat/releases, download winboat-guest-server.zip, extract it into C:\Program Files\WinBoat, open RDPApps.reg, and run install.bat as administrator.
Close and reopen WinBoat afterwards.
xDroid Android Emulator
Download it from Beijing Linzhuo Information Technology.
tar xvf xDroidInstall-x86_64-v13.2.380-20250306.tar.xz
./xDroidInstall-x86_64-v13.2.380-20250306.run
Sublime Text
Linux Package Manager Repositories - Sublime Text
paru -S sublime-text-4EmEditor (Wine)
A fast text editor for huge files.
# install
paru -S emeditor-wine
# uninstall
paru -R emeditor-wine
rm -rf ~/.wine-emeditorDownloadEmEditor.exe.
emeditor_dir="$(find "$HOME/.wine-emeditor/drive_c/users" -mindepth 1 -maxdepth 1 -type d ! -name Public -exec test -d '{}/AppData/Local/Programs/EmEditor' ';' -print -quit)/AppData/Local/Programs/EmEditor"
cp -a "$emeditor_dir/EmEditor.exe" "$emeditor_dir/EmEditor.exe.bak"
cp ~/Downloads/EmEditor.exe "$emeditor_dir/EmEditor.exe"
Please support genuine software. Purchasing a legitimate license provides better technical support and helps developers keep improving the product.
Typora
paru -S typora-free-with-pluginActivation example for Typora 1.9.3:
$ git clone https://github.com/hazukieq/Yporaject.git
$ sudo apt install cargo
$ cd Yporaject/
$ cargo build & cargo run
$ sudo cp target/debug/node_inject /usr/share/typora

$ cd /usr/share/typora/
$ sudo chmod +x node_inject
$ sudo ./node_inject
extracting node_modules.asar
adding hook.js
applying patch
packing node_modules.asar
done!

$ cd -
$ cd license-gen/
$ cargo build & cargo run
License for you: ……
Then in Typora, open Help -> My License -> Enter serial number. Use any email. If it later asks whether to try a China-domain activation fallback because the server cannot be reached, choose confirm.
Please support genuine software. Purchasing a legitimate license provides better technical support and helps developers keep improving the product.
Obsidian
From personal notes and journals to knowledge bases and project management, Obsidian provides a flexible note system.

paru -S obsidian-binPandoc
Pandoc is an open-source document converter that supports Markdown, HTML, LaTeX, Word, and many other formats.
proxychains -q sudo paru -S pandoc-binXnView MP
A free image viewer and manager with support for a large number of formats, batch rename, batch conversion, duplicate detection, image comparison, contact sheets, and slideshows.
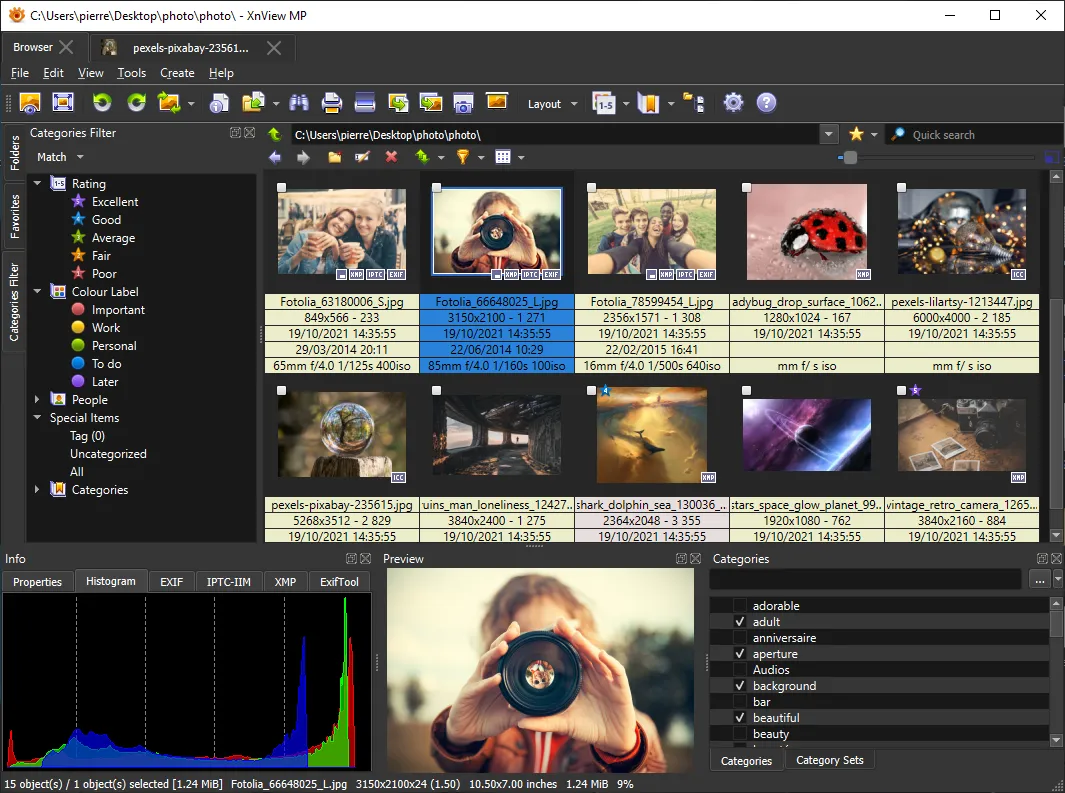
paru -S xnviewmpuTools
A quick launcher with a plugin ecosystem.
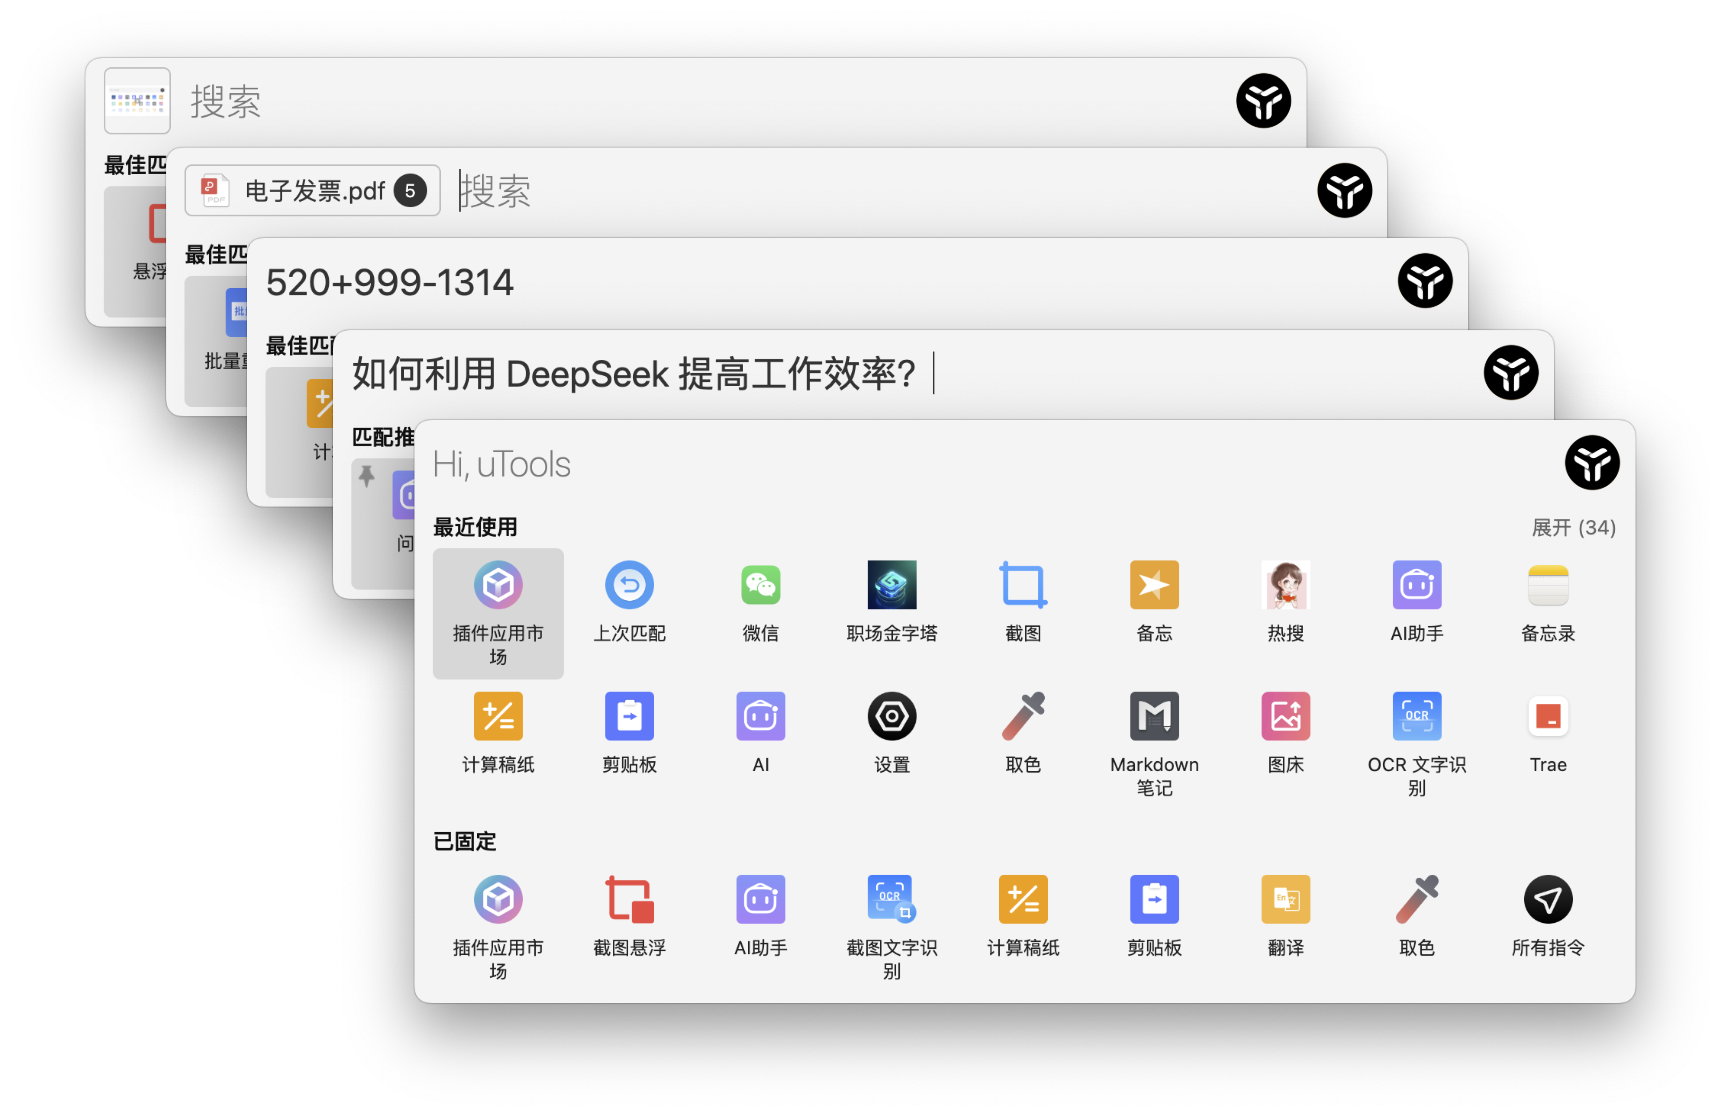
paru -S utools-binThe default KRunner shortcut is Alt Space.
Rubick
An open-source quick launcher and plugin platform.
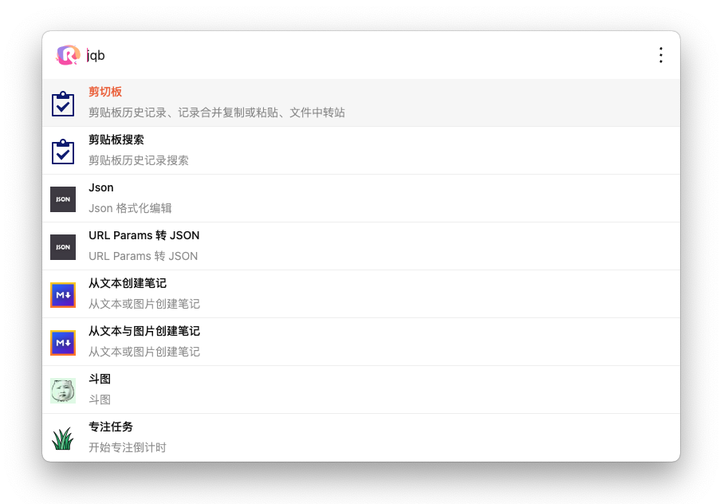
Releases · rubickCenter/rubick
paru -S rubickKeePassXC
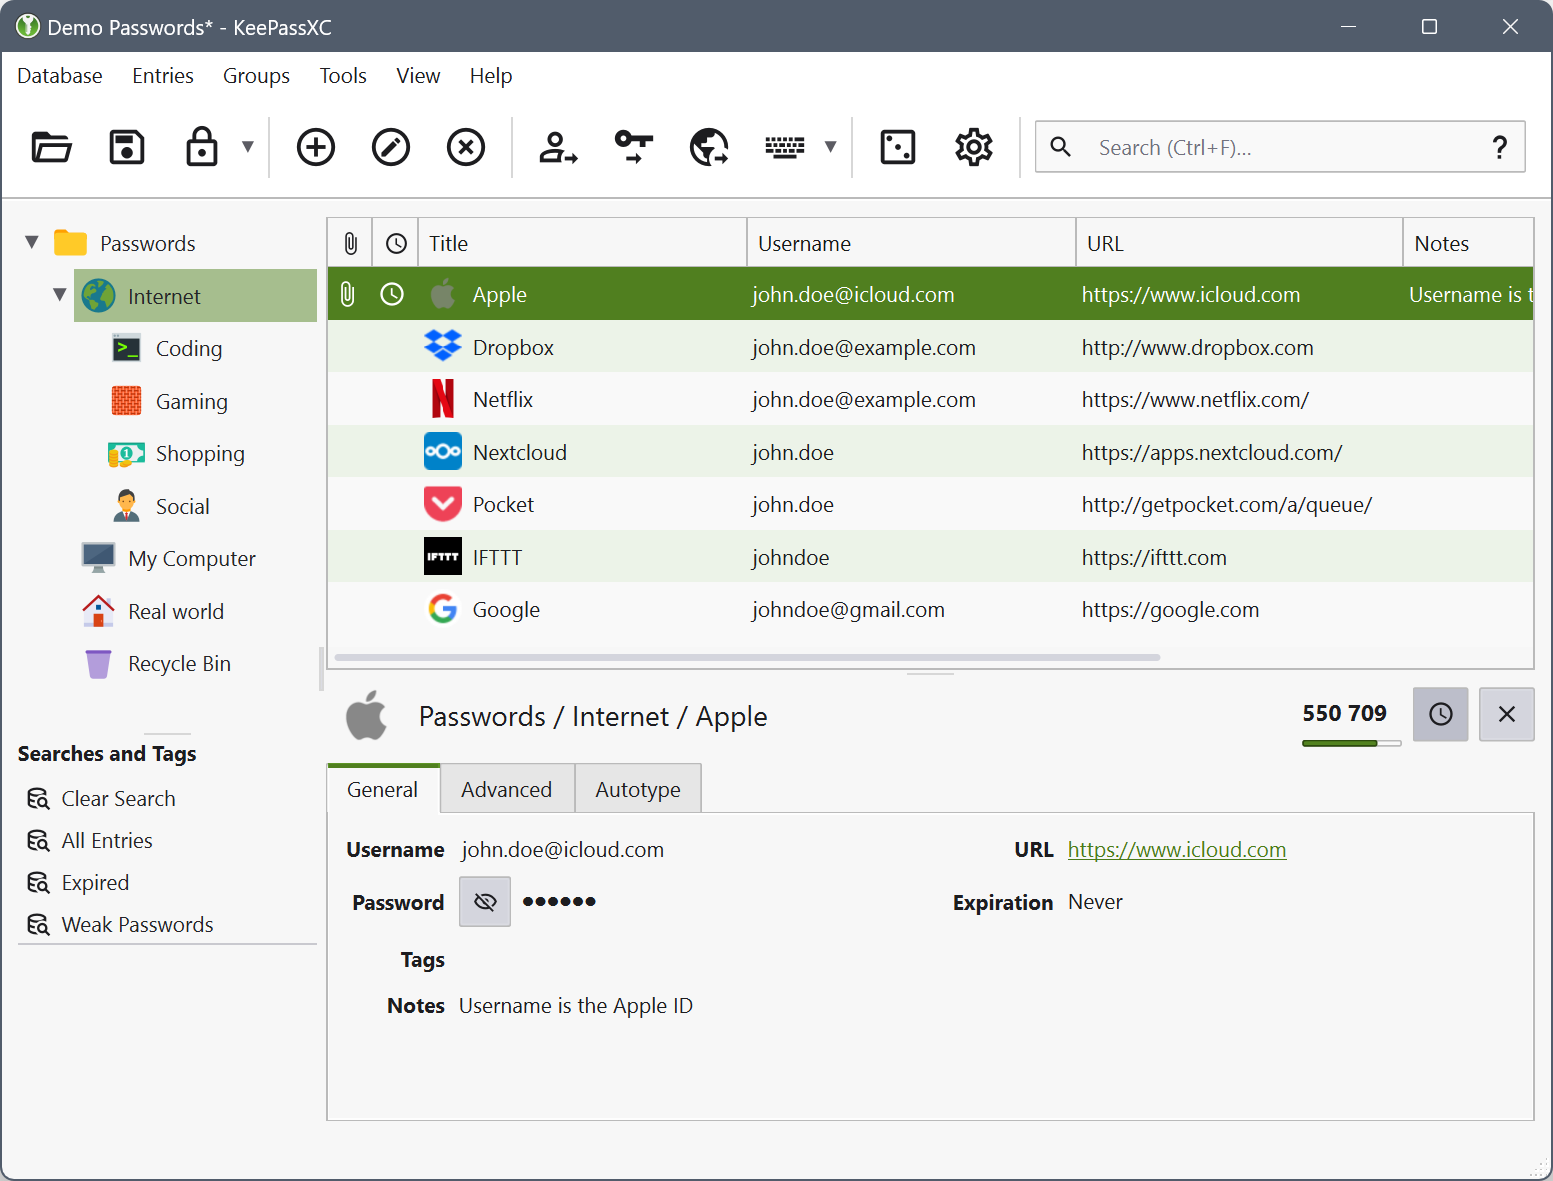
sudo pacman -S keepassxcIn KeePassXC, go to Tools -> Settings -> Browser Integration -> Advanced, enable Use custom proxy location, and point it to /usr/bin/keepassxc-proxy.
FSearch
A fast desktop-wide file search tool.
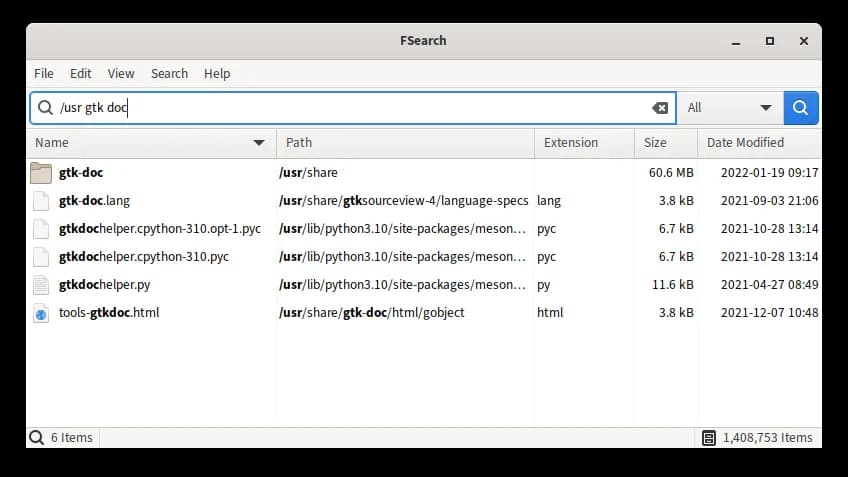
paru -S fsearchAfter launch, go to Options -> Database and add /.
Common issue:
AnyTXT Searcher
A free full-text desktop search tool.

paru -S anytxt-binSimpleScreenRecorder
SimpleScreenRecorder can record the whole desktop, a single application window, or a custom region with synchronized audio and video.
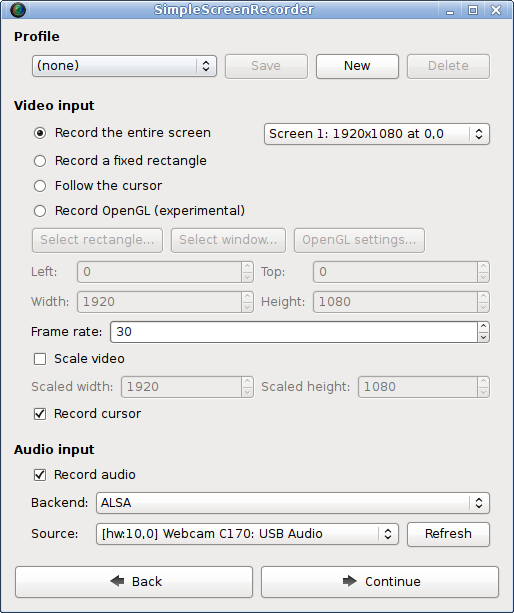
Download - SimpleScreenRecorder
$ paru -S simplescreenrecorderIf the build fails, follow the error message. For example:
==> Starting build()...
CMake Error at CMakeLists.txt:1 (cmake_minimum_required):
Compatibility with CMake < 3.5 has been removed from CMake.
...

# clone the AUR package
$ git clone https://aur.archlinux.org/simplescreenrecorder.git
$ cd simplescreenrecorder
# add -DCMAKE_POLICY_VERSION_MINIMUM=3.5 to the cmake line in PKGBUILD
$ nano PKGBUILD
……
  cmake -DCMAKE_INSTALL_PREFIX="/usr" -DCMAKE_BUILD_TYPE=Release \
    -DWITH_QT5=on \
    -DCMAKE_INSTALL_LIBDIR='lib' -DCMAKE_POLICY_VERSION_MINIMUM=3.5 ../
……
# build and install
$ makepkg -si
Free Download Manager
A modern download manager.
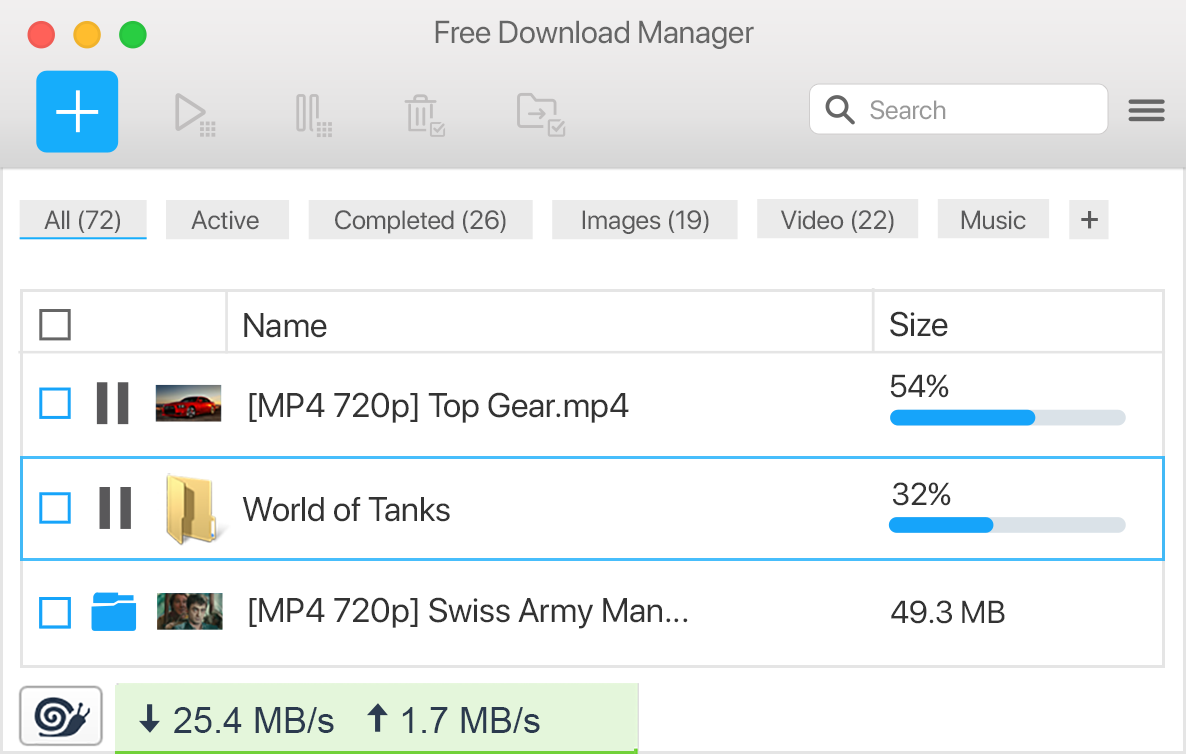
Free Download Manager for Linux
paru -S freedownloadmanagerBrowser extensions:
Gopeed
A modern, open-source, lightweight downloader supporting HTTP, BitTorrent, Magnet, and more.
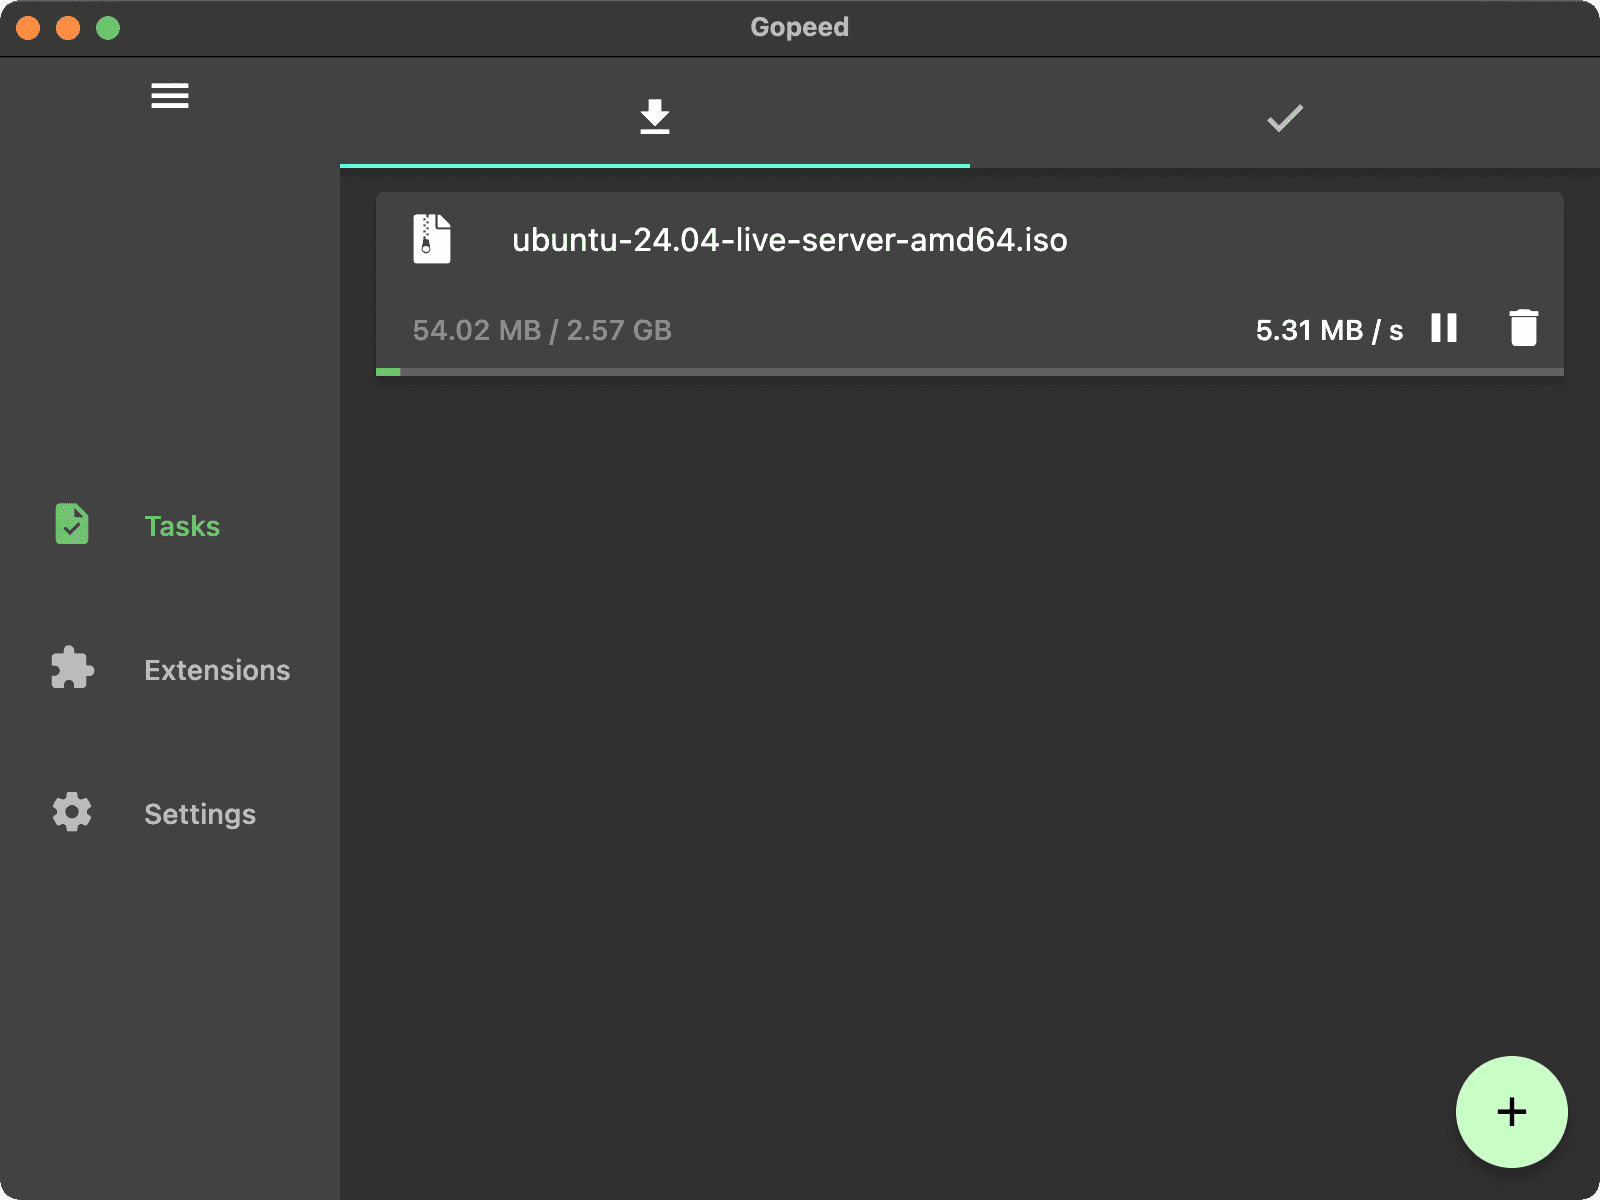
paru -S gopeed-binExtensions:


Motrix Next
A full-featured download manager.
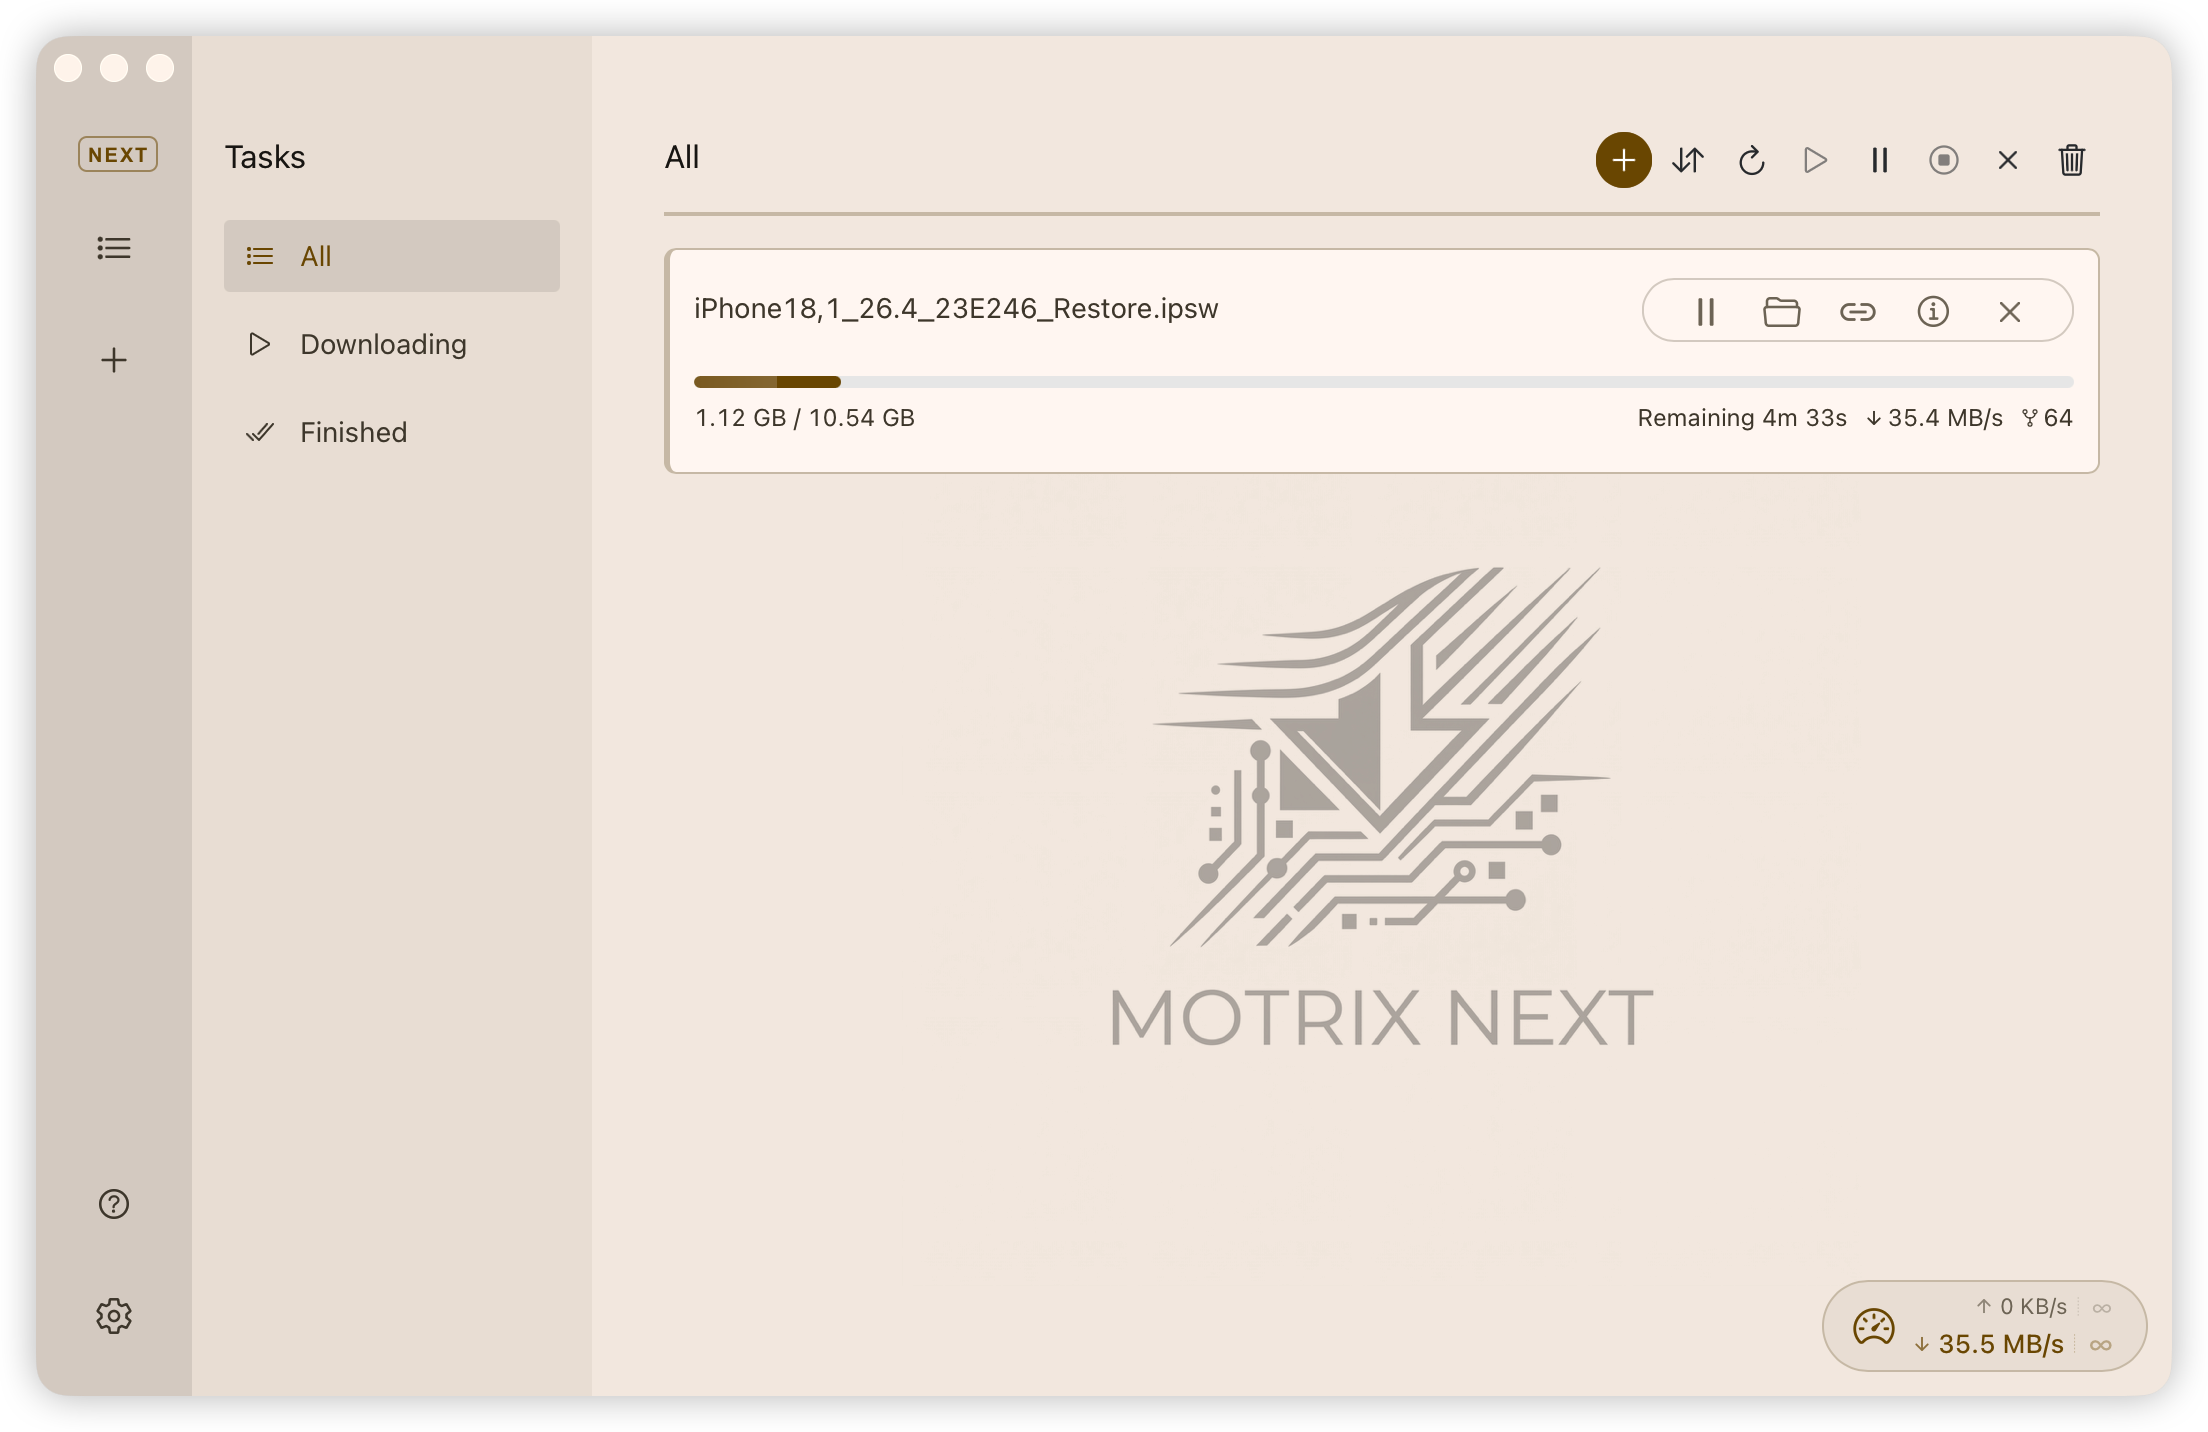
AnInsomniacy/motrix-next - GitHub
paru -S motrix-next-binqBittorrent Enhanced Edition
An enhanced BT client based on qBittorrent.
Releases · c0re100/qBittorrent-Enhanced-Edition
paru -S qbittorrent-enhancedTransmission
A fast, simple, and free BitTorrent client.
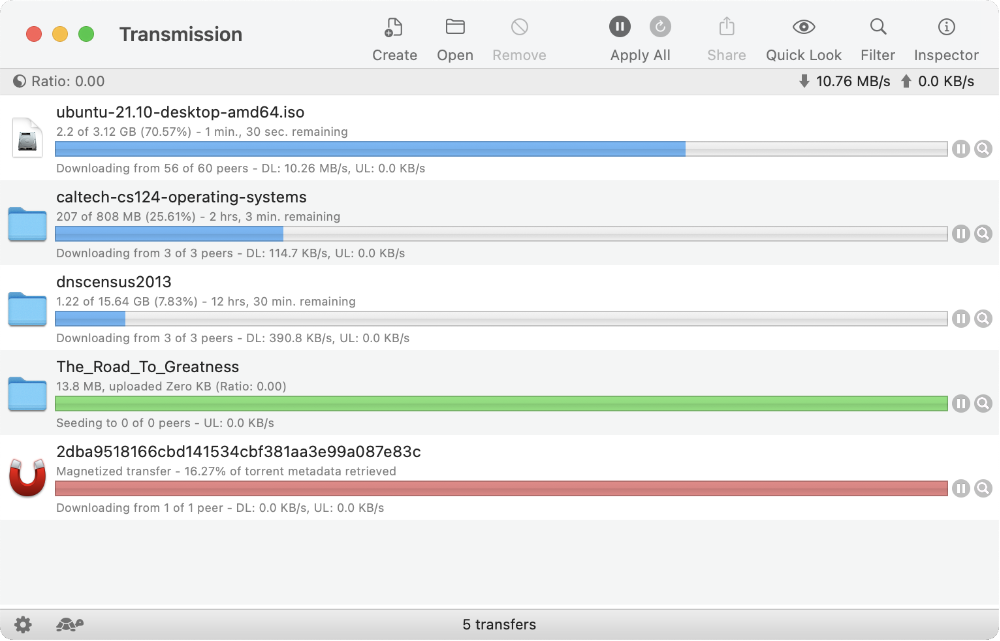
paru -S transmission-qtXunlei
paru -S xunlei-binPeaZip
A free archive manager that supports opening and extracting RAR, TAR, ZIP, and many other formats.
Download PeaZip for Linux x86_64
paru -S peazip-qt-binSynology Drive Client
Synology Drive Client provides file synchronization and PC backup to a central Synology Drive Server.
paru -S synology-driveIgnore sync directories
Synology Drive Client filtered sync directories
You can use the helper script synology-ignore-monitor.sh to monitor the underlying blacklist.filter file and reapply ignore rules automatically.
$ mkdir -p ~/.local/bin
# download the script into the local bin directory
$ curl -fL -o ~/.local/bin/synology-ignore-monitor.sh https://raw.githubusercontent.com/duanluan/shell-scripts/main/synology-ignore-monitor.sh
# make it executable
$ chmod +x ~/.local/bin/synology-ignore-monitor.sh
$ mkdir -p ~/.config/systemd/user/
$ nano ~/.config/systemd/user/synology-ignore.service
[Unit]
Description=Synology Drive Blacklist Monitor
After=local-fs.target
[Service]
Type=simple
ExecStart=/bin/bash %h/.local/bin/synology-ignore-monitor.sh
Restart=always
RestartSec=3
[Install]
WantedBy=default.target
# reload the user systemd config
$ systemctl --user daemon-reload
# enable and start the service
$ systemctl --user enable --now synology-ignore.service
# verify that it shows active (running)
$ systemctl --user status synology-ignore.service
# follow the logs
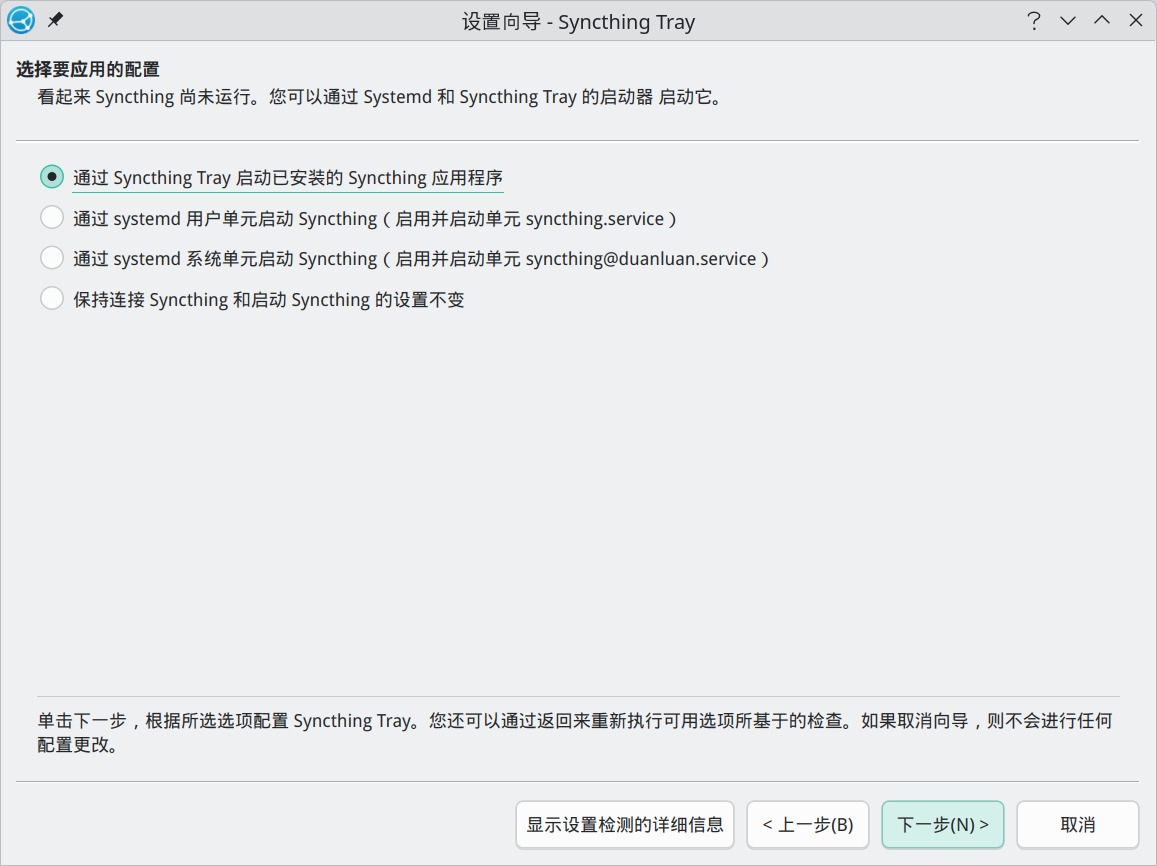
$ journalctl --user -u synology-ignore.service -fSyncthing + Syncthing Tray
Syncthing is an open-source real-time file synchronization tool. Syncthing Tray adds a tray icon and integration helpers.
paru -S syncthing-bin
paru -S syncthingtray
In the Syncthing Tray setup wizard, choose Start the installed Syncthing application via Syncthing Tray.
GnuPG + GpgFrontend
# install GnuPG
sudo pacman -S gnupg
GpgFrontend is a modern, open-source, cross-platform OpenPGP GUI aimed at both beginners and advanced users.

paru -S gpgfrontendSnipaste
Snipaste is a lightweight yet powerful screenshot tool with screenshot pinning.
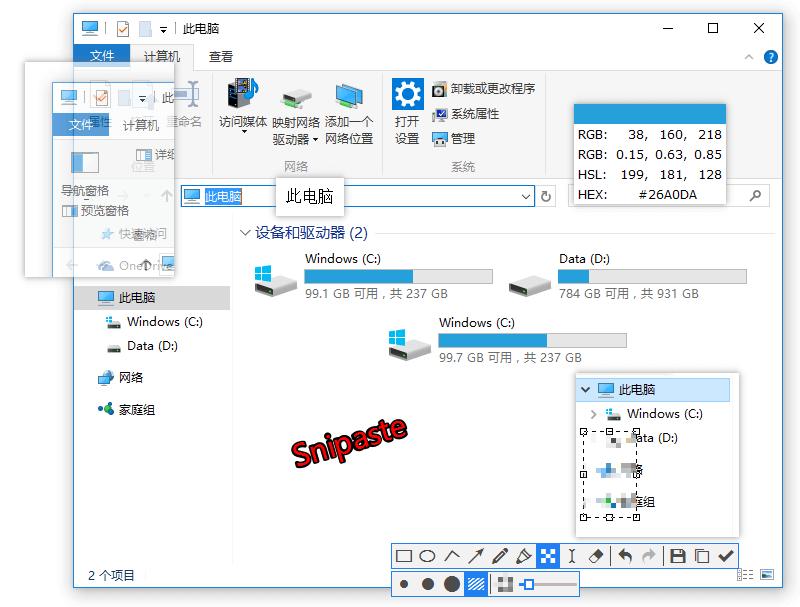
paru -S snipasteTo avoid global shortcut conflicts on Wayland:
Issue #3548 - Snipaste global shortcuts cannot override other apps on KDE Plasma Wayland
Right-click the Snipaste tray icon -> Preferences -> Control -> Global Hotkeys, and clear the shortcut for Screenshot.
Then in System Settings -> Keyboard -> Shortcuts, create a new Command or Script shortcut with the command Snipaste snip, assign F1, and apply it.
The Ctrl+T pin shortcut can still conflict with other apps afterwards.
Reference: Snipaste command-line options
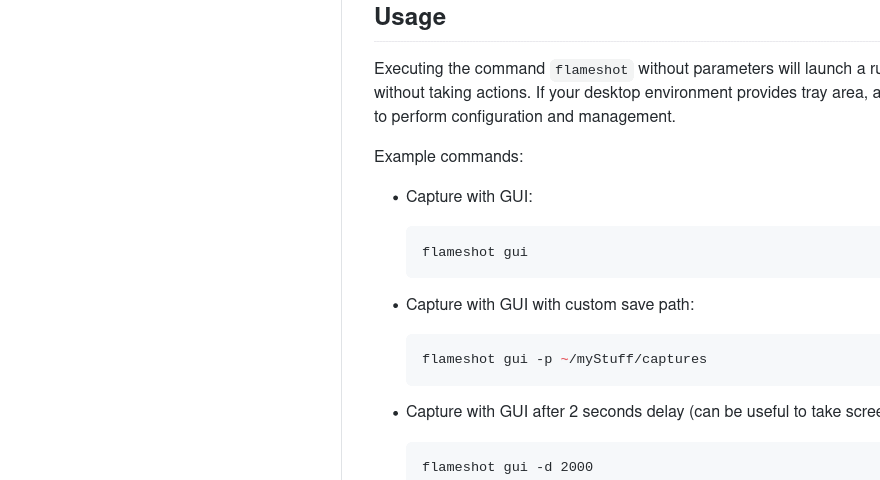
Flameshot
Flameshot is a free and open-source cross-platform screenshot tool with many built-in features.
# install Flameshot
sudo pacman -S flameshot
Create shortcuts in System Settings -> Keyboard -> Shortcuts -> Add New -> Command or Script.
| Action | Command | Suggested Shortcut |
|---|---|---|
| Flameshot area capture | flameshot gui | |
| Delayed area capture | flameshot gui -d 3000 | Ctrl + Print |
| Area capture and pin | flameshot gui --pin | Shift + Print |
| Full-screen capture | flameshot full -p ~/Pictures/Screenshots | Ctrl + Shift + Print |
If area captures are black on Wayland:
Prefix the command with
QT_QPA_PLATFORM=xcb.If pinned images do not stay on top on Wayland:
Go to
System Settings->Window Management->Window Rules->Add New. Pin an image first, useDetect Window Properties, click the pinned image window, and add rules forWindow class (application),Window title, andKeep above other windows.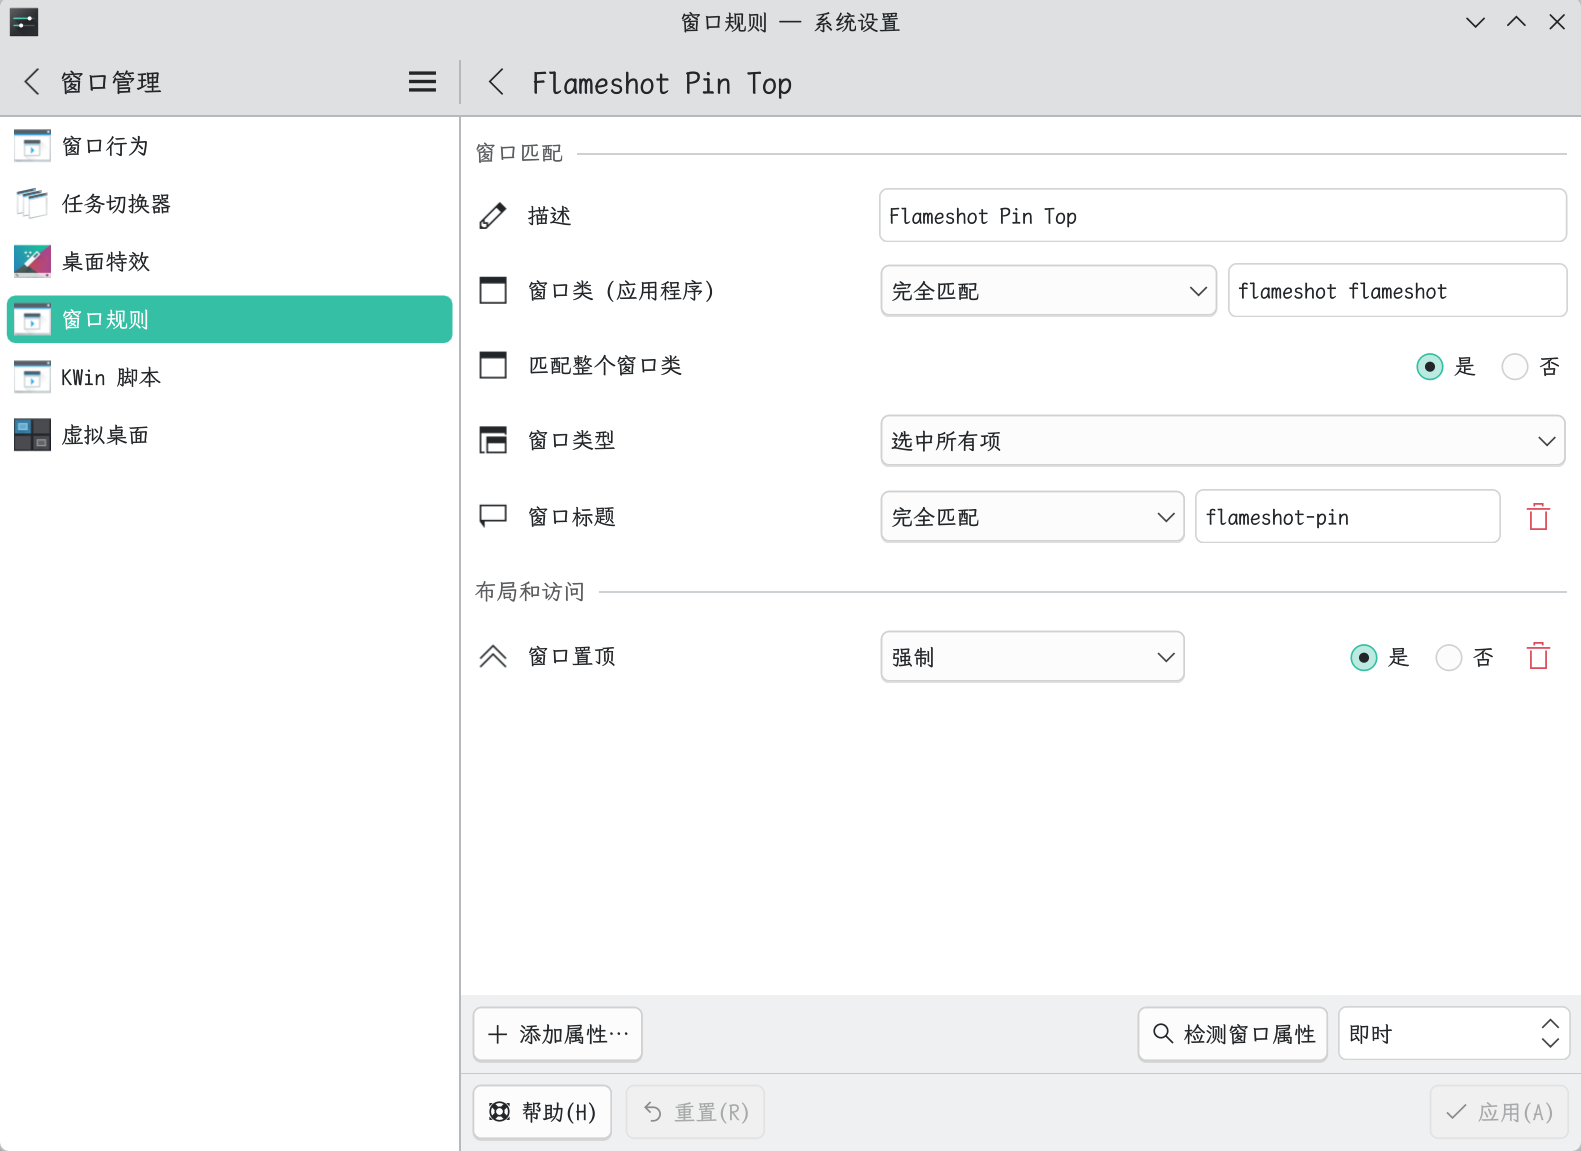
- Description:
Flameshot Pin Top - Window class (application):
Exact Matchflameshot flameshot - Window title:
Exact Matchflameshot pin - Keep above other windows:
ForceYes
- Description:
eSearch
Screenshot + OCR + search + translation + image pinning + screen translation + reverse image search + scrolling capture + screen recording.
Releases · xushengfeng/eSearch
paru -S e-searchXMind
A mind-mapping and brainstorming tool.
# clone and build v23.08
git clone https://aur.archlinux.org/xmind.git
cd xmind
git checkout f9f4f8
makepkg -si
Releases · henryau53/xmind-crack-patch
Install nvm + Node.js + pnpm + nrm first as described in the development section.
pnpm add -g asar

git clone https://github.com/henryau53/xmind-crack-patch.git
cd xmind-crack-patch

asar pack ./app.asar.non-windows app.asar

sudo cp app.asar /opt/Xmind/resources/app.asar
Draw.io Desktop
A free and open-source diagramming tool.

Releases · jgraph/drawio-desktop
sudo pacman -S drawio-desktopSunshine + Moonlight
A self-hosted game streaming setup where Sunshine runs on the host and Moonlight runs on the client.
Sunshine + Moonlight low-latency streaming and tablet second-screen notes
paru -S sunshine-bin
paru -S moonlight-qt-bin
OBS Studio
Free and open-source software for recording and live streaming.
# method 1
sudo pacman -S obs-studio

# method 2: ffmpeg-obs conflicts with ffmpeg
paru -S obs-studio-tytan652

# method 3
paru -S obs-studio-liberty
Keyviz Chinese-localized build
Keyviz is a free and open-source keystroke visualizer that shows your keyboard and mouse actions in real time.
paru -S keyviz-zh-binStartLive
A Bilibili streaming helper.

Install uv first as described in the development section.
mkdir -p ~/.local/share/startlive
# clone the source
git clone https://github.com/Radekyspec/StartLive.git ~/.local/share/startlive
cd ~/.local/share/startlive

# create a virtual environment
uv venv
# activate it
source .venv/bin/activate
# install dependencies
uv pip install -r requirements.txt
# install the fallback keyring backend
uv pip install keyrings.alt
# force Python to use the plaintext keyring backend
mkdir -p ~/.config/python_keyring/
echo "[backend]
default-keyring=keyrings.alt.file.PlaintextKeyring" > ~/.config/python_keyring/keyringrc.cfg

# create the desktop file
cat <<EOF > ~/.local/share/applications/startlive.desktop
[Desktop Entry]
Type=Application
Name=StartLive
Exec=$HOME/.local/share/startlive/.venv/bin/python $HOME/.local/share/startlive/StartLive.py
Icon=$HOME/.local/share/startlive/resources/icon_left.ico
Path=$HOME/.local/share/startlive
Terminal=false
Categories=Network;Video;
EOF
# update the desktop database
update-desktop-database ~/.local/share/applications/
VLC Media Player
VLC is a free, open-source, cross-platform media player and framework.
sudo pacman -S vlcSMPlayer
SMPlayer is a free media player for Linux and Windows with built-in codecs.

paru -S smplayer-gitRemote Desktop Manager + FreeRDP
Remote Desktop Manager centralizes remote connections, credentials, and team sharing in one platform.
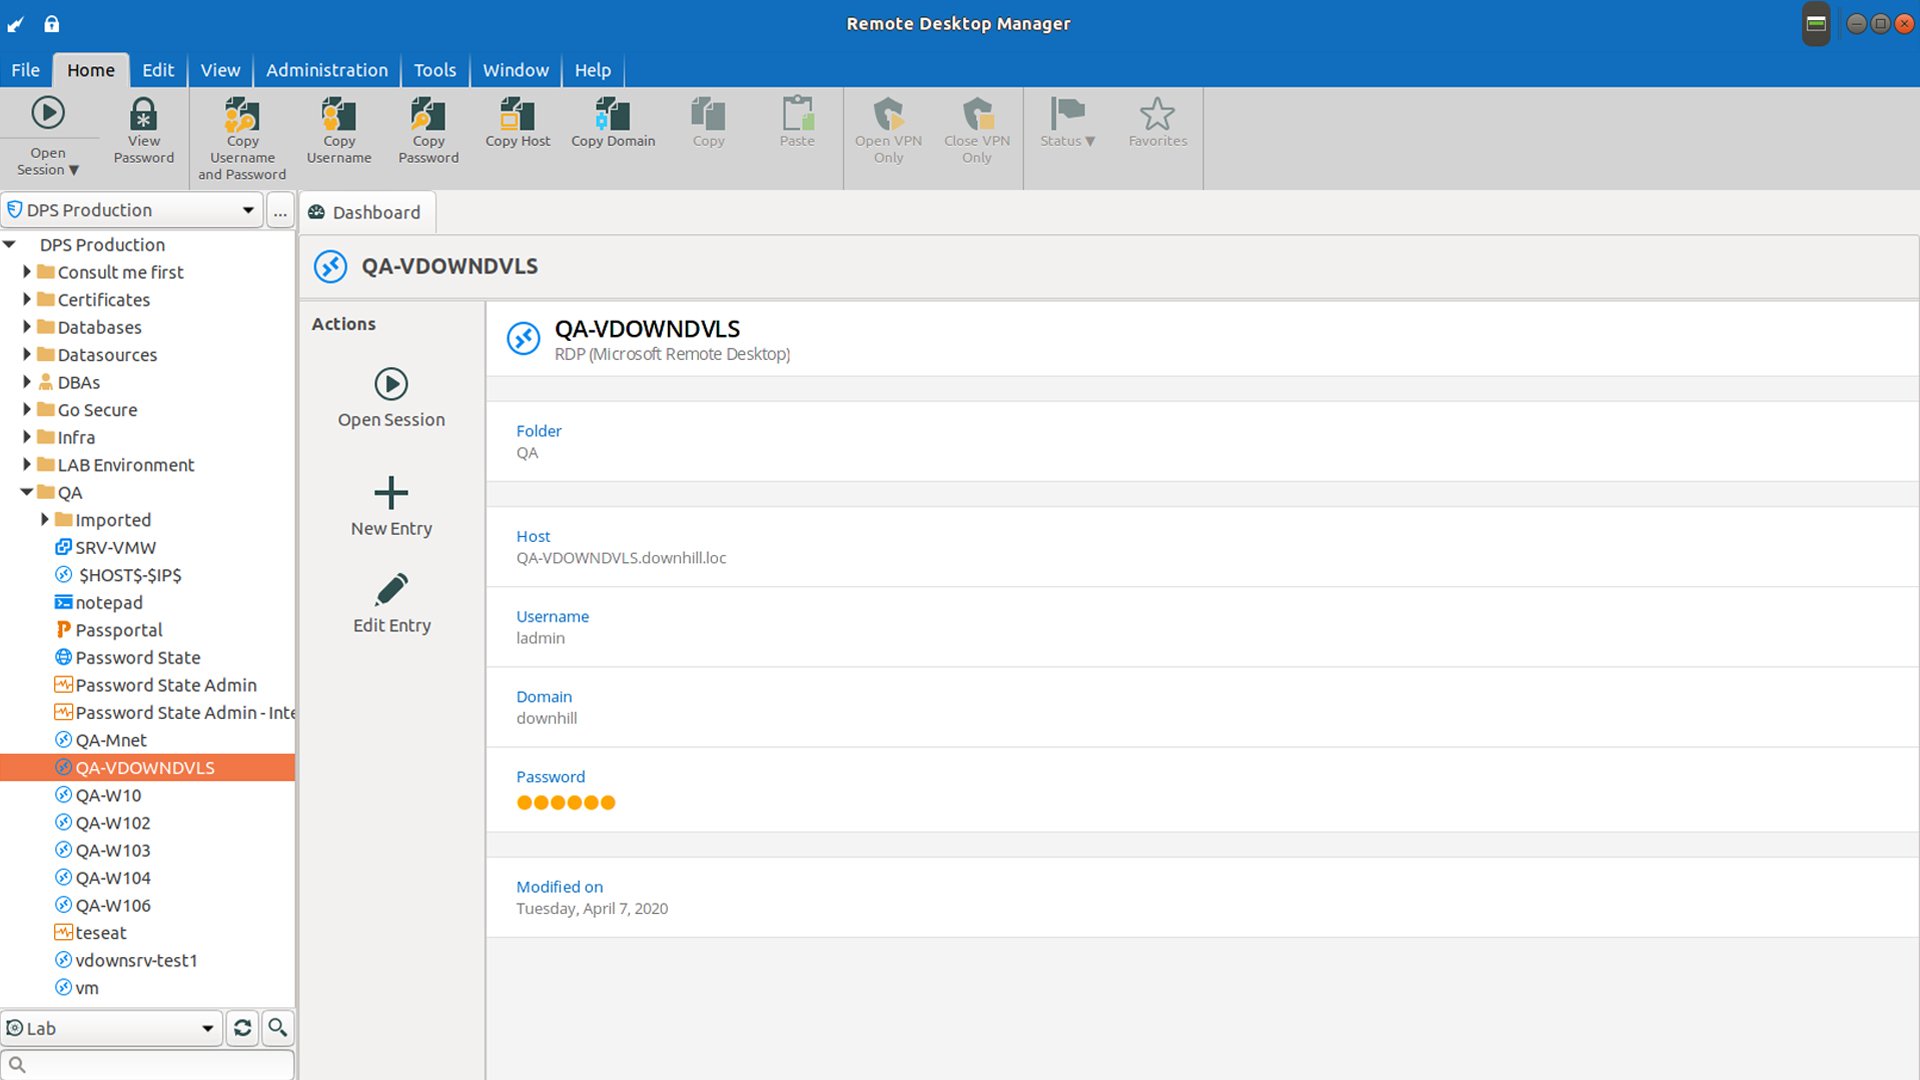
Download Remote Desktop Manager
# install FreeRDP
sudo pacman -S freerdp
# install Remote Desktop Manager
paru -S remote-desktop-manager
EasyTier
A simple, secure, decentralized VPN-style overlay networking solution written in Rust and Tokio.
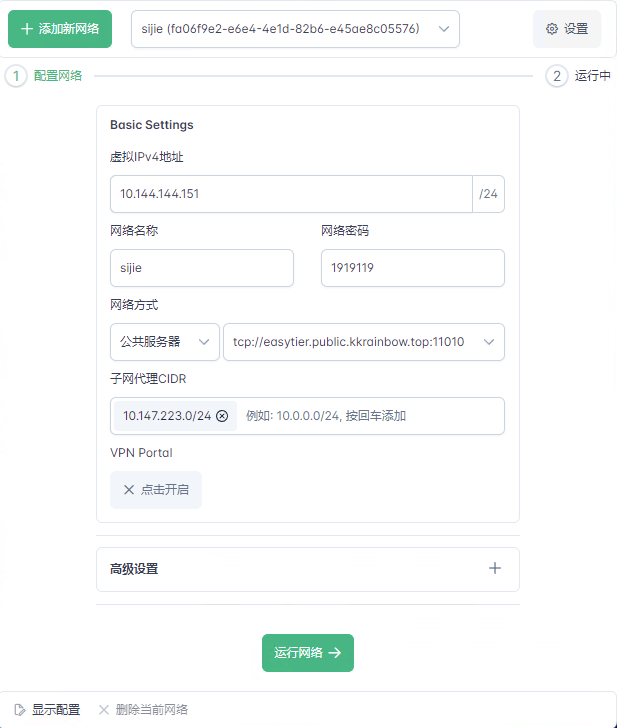
Build an EasyTier relay node on Synology Docker
# install with the official script
$ wget -O /tmp/easytier.sh "https://raw.githubusercontent.com/EasyTier/EasyTier/main/script/install.sh" && sudo bash /tmp/easytier.sh install
 Install EasyTier successfully!
...

# stop the default service
$ systemctl stop easytier@default
# generate a config via https://easytier.cn/web/index.html#/config_generator
$ sudo nano /opt/easytier/config/default.conf
# start the service
$ systemctl start easytier@default


# update EasyTier
wget -O /tmp/easytier.sh "https://raw.githubusercontent.com/EasyTier/EasyTier/main/script/install.sh" && bash /tmp/easytier.sh update
Note:
- If
easytier-coreprintsrpc_portal = "0.0.0.0:15888"in generated TOML, keep the local/opt/easytier/config/default.confvalue asrpc_portal = "0.0.0.0:0"or the network may fail to connect.
cpolar
Expose a local HTTP service as public HTTPS. Useful for debugging WeChat official account callbacks, mini-programs, Alipay gateways, and similar cloud integrations. Free accounts get one 1 Mbps online cpolar process.

After registering, get your authtoken.
# install
curl -L https://www.cpolar.com/static/downloads/install-release-cpolar.sh | sudo bash
# optional: enable the service at boot
systemctl enable cpolar
systemctl start cpolar

# save the auth token
cpolar authtoken $YOUR_AUTHTOKEN

# expose port 80
cpolar http 80
ngrok
After registering, copy your authtoken.
# install
paru -S ngrok

# save the auth token
ngrok config add-authtoken $YOUR_AUTHTOKEN

# expose port 80
ngrok http 80
RustDesk
An open-source remote desktop tool that can be self-hosted.
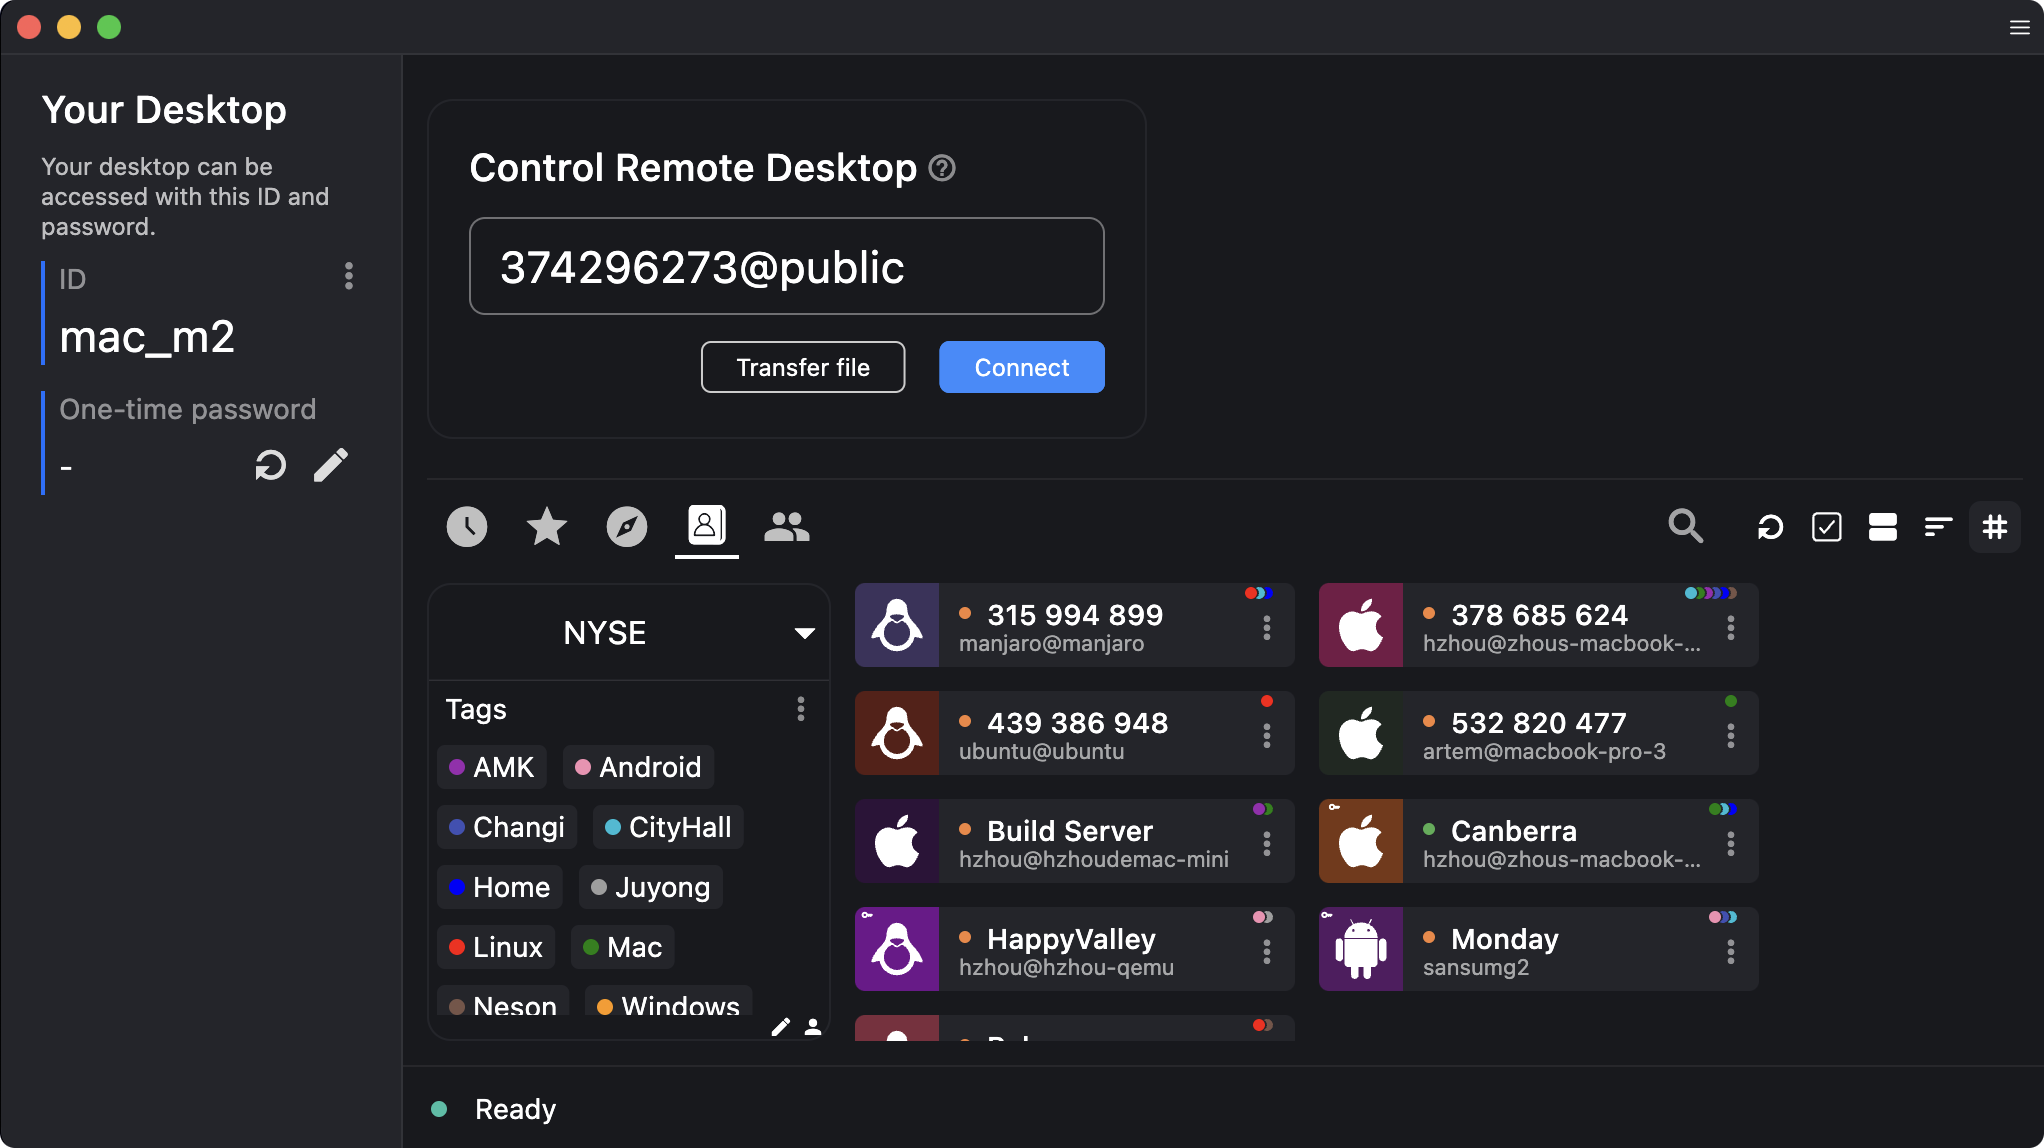
# install
$ paru -S rustdesk-bin

==> NOTE: The RustDesk daemon must be started for RustDesk to work.
==> NOTE: To start it automatically on boot, run 'sudo systemctl enable --now rustdesk' in a terminal.

# enable the service
$ sudo systemctl enable --now rustdesk
To change scaling: search for RustDesk, right-click Edit Applications..., and add GDK_SCALE=2 under General -> Environment Variables.
If rustdesk fails from the command line with a missing libxdo.so.3:
$ rustdesk
Failed to load "librustdesk.so"
libxdo.so.3: cannot open shared object file: No such file or directory

# install xdotool
$ sudo pacman -Syu xdotool
# inspect the installed libxdo files
$ ldconfig -p | grep libxdo
        libxdo.so.4 (libc6,x86-64) => /usr/lib/libxdo.so.4
        libxdo.so (libc6,x86-64) => /usr/lib/libxdo.so
# create a compatibility symlink
$ sudo ln -s /usr/lib/libxdo.so.4 /usr/lib/libxdo.so.3
TeamViewer

paru -S teamviewer
teamviewer --daemon start
AnyDesk
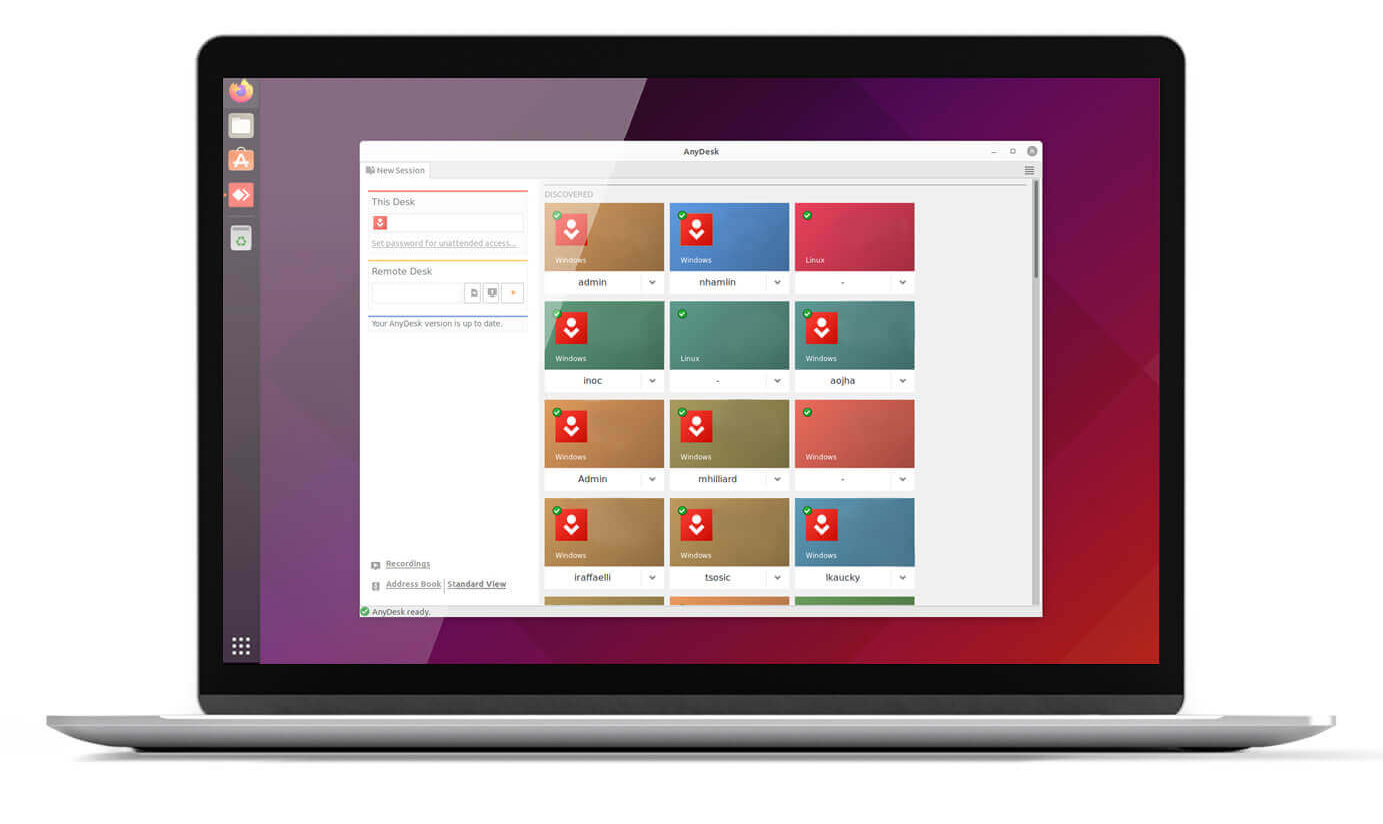
paru -S anydesk-bin

# enable at boot
systemctl enable anydesk.service
Sunlogin

paru -S sunloginclient

# start the service
sudo systemctl start runsunloginclient.service
# enable at boot
sudo systemctl enable runsunloginclient.service
ToDesk

# install ToDesk
paru -S todesk-bin
If networking does not work after install, start the service.
Method 1: enable at boot
shell$ sudo systemctl enable --now todeskd.serviceMethod 2: start it when launching the app
shell$ sudo nano /opt/todesk/bin/start-todesk.sh #!/bin/bash if ! systemctl is-active --quiet todeskd.service; then pkexec systemctl start todeskd.service fi export LIBVA_DRIVER_NAME=iHD export LIBVA_DRIVERS_PATH=/opt/todesk/bin exec /opt/todesk/bin/ToDesk # make it executable $ sudo chmod +x /opt/todesk/bin/start-todesk.shSearch for
ToDesk, right-clickEdit Applications..., clearEnvironment Variables, and change the executable path to/opt/todesk/bin/start-todesk.sh.
CopyQ
CopyQ monitors the system clipboard and saves its history for later reuse.
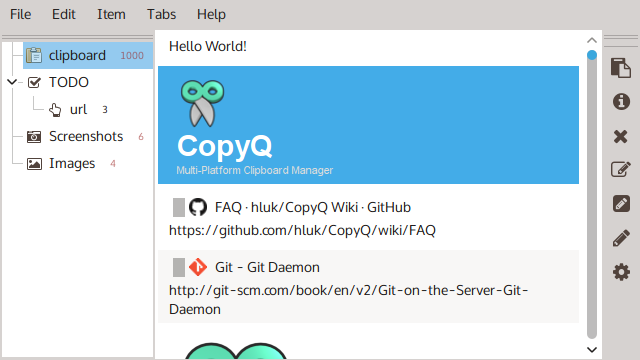
sudo pacman -S copyqRight-click the tray icon -> Configure Clipboard -> Shortcuts, and clear the global shortcut for Show Clipboard Items At Cursor Position.
Then open CopyQ and set File -> Preferences -> Shortcuts -> Global -> Show/Hide Main Window to Meta/Super + V.
Lightningvine / LocalSend
Lightningvine is a LocalSend-based file transfer tool that adds WebDAV and cloud-transfer capabilities. Since it is not yet on AUR, install LocalSend for now:
paru -S localsend-binCalibre
An ebook management, reading, editing, and conversion suite.
# avoid calibre-bin from AUR; it cannot switch the UI language correctly
sudo pacman -S calibre
QGIS
Spatial visualization and decision-making tools for everyone, designed for map creation.

# Install the stable release
pacman -S qgis

# Or install the long-term release; it is newer, but takes a long time to compile
# Leave the Conda environment; if Conda is not active, ignore the error
conda deactivate 2>/dev/null || true
# Put system program directories first to avoid picking up Python from Miniforge
export PATH="/usr/bin:/bin:/usr/sbin:/sbin"
# Clear variables that affect Python library lookup and environment selection
unset PYTHONHOME PYTHONPATH CONDA_PREFIX CONDA_DEFAULT_ENV VIRTUAL_ENV
paru -S qgis-ltr