System and Essentials
base-devel + cmake + unzip (Required)
sudo pacman -S base-devel cmake unzipbase-devel: the base development tool group that includes common tools required for building packages.cmake: a cross-platform build system generator, commonly used when compiling software from source.unzip: extracts ZIP archives.
Restore the X11 Login Option
# install X11 session support and the required window manager components
sudo pacman -S plasma-x11-session kwin-x11
Log out to the login screen, choose the Plasma (X11) session in the lower-left corner, and log in again.
GPU Drivers
If the GPU driver is not installed correctly, you may run into problems such as the system failing to wake from suspend.
For the full RTX lineup (40, 30, and 20 series), GTX 16/10 series (1660, 1080, 1060, and similar), and GTX 900 series (Maxwell architecture):
# refresh package databases and update the system
sudo pacman -Syyu
# install the proprietary driver stack and automatically blacklist nouveau
# 0300 is the PCI class code for a display controller.
sudo mhwd -a pci nonfree 0300
# after rebooting, this should show video-nvidia
mhwd -li
For other GPUs, see:
- Configure Graphics Cards - Manjaro (recommended)
- Graphics Drivers | Arch Linux Simple Guide (recommended)
- Intel graphics - Arch Linux Chinese Wiki
- ATI - Arch Linux Chinese Wiki
- NVIDIA - Arch Linux Chinese Wiki
- PRIME - Arch Linux Chinese Wiki
AUR Helpers: Yay and Paru (Required)
AUR helpers simplify installation of community packages from the Arch User Repository.
# install yay
sudo pacman -S yay
# enable devel package update checks and save the setting permanently
yay -Y --devel --save
You can also use paru, which is more capable but usually a bit slower to build:
# clone the paru source repository
git clone https://aur.archlinux.org/paru.git
cd paru
# build and install paru
makepkg -si

# after installation, return to the parent directory and remove the source tree
cd ..
rm -rf paru
Core difference: Yay normally compares against the static version number on the AUR page, while Paru can actively run package scripts and calculate the live upstream version.
You can search packages on AUR - Packages, or from the command line:
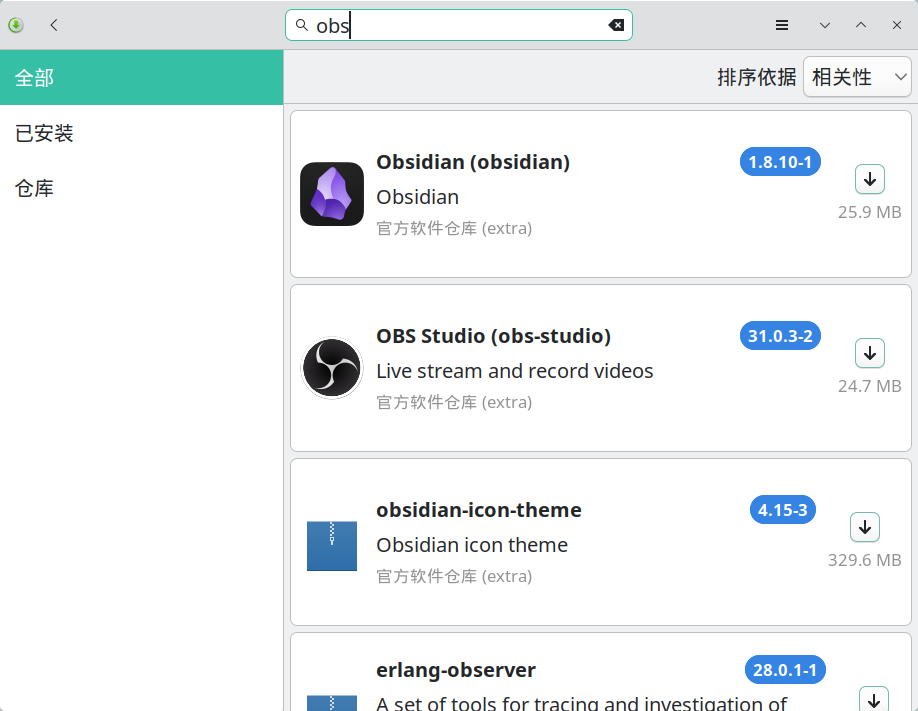
yay -Ss package-nameYou can also search for Add/Remove Software in the application menu and install packages there.
Common issues:
- When reviewing build files in the pager prompt (
:waiting for input), pressqto exit the review and continue installation. - Fix “One or More Files Did Not Pass the Validity Check”
paru: error while loading shared libraries: libalpm.so.15: cannot open shared object file: No such file or directory: if this appears after a system update, clone and rebuild the latest version ofparu.
Zram Compression and Swappiness Tuning
Zram creates a compressed block device in memory and uses it as swap. Because RAM is much faster than disk and Zstd compression is efficient, it can noticeably improve responsiveness and prevent the machine from freezing under heavy memory pressure.
zram: Compressed RAM-based block devices — The Linux Kernel documentation
General guidelines:
- Zram size: set it to 50% of physical memory (
zram-fraction = 0.5).- Low-memory devices (<16 GB): you can be more aggressive and set it to 100% (
1.0) to reduce the risk of running out of memory. - High-memory devices (≥32 GB): 50% (
0.5) is already more than enough, providing a large compressed swap area while still keeping plenty of RAM available.
- Low-memory devices (<16 GB): you can be more aggressive and set it to 100% (
- Swappiness: when using Zram, keep the default 60 or even increase it to 100. This encourages the system to move cold pages into Zram and free RAM for file cache. Do not set it to 10 when Zram is enabled.
1. Install and Configure Zram
# install zram-generator
sudo pacman -S zram-generator

# create the config file
sudo nano /etc/systemd/zram-generator.conf
Add the following configuration. Note that this removes the default 4 GB limit:
[zram0]
# zstd offers the best balance between performance and compression ratio
compression-algorithm = zstd
# percentage of physical memory to allocate to zram
zram-fraction = 0.5
# remove the default 4096 MB limit, otherwise large-memory machines only get 4 GB
max-zram-size = none
# make sure zram has higher priority than disk swap
swap-priority = 100
Start the service:
# reload systemd and start zram
sudo systemctl daemon-reload
sudo systemctl start dev-zram0.swap

# verify the status
zramctl
# expected example output (DISKSIZE should be close to your physical memory size, e.g. 64G):
# NAME       ALGORITHM DISKSIZE DATA COMPR TOTAL STREAMS MOUNTPOINT
# /dev/zram0 zstd           32G   4K   64B   20K      16 [SWAP]
If you change the config file and want the changes to take effect immediately without rebooting, use this full reset flow:
# 1. stop the related services
sudo systemctl stop dev-zram0.swap
sudo systemctl stop systemd-zram-setup@zram0.service

# 2. unload the kernel module to clear the old device state
# if the module is busy, run sudo swapoff /dev/zram0 first
sudo modprobe -r zram

# 3. reload the configuration
sudo systemctl daemon-reload

# 4. start the service again
sudo systemctl start dev-zram0.swap
2. Adjust Swappiness
# check the current value (Manjaro defaults to 60 in most cases)
cat /proc/sys/vm/swappiness

# make sure it is not 10; if needed, force it to 60 or higher, such as 100
sudo nano /etc/sysctl.d/99-swappiness.conf
Add:
# tuning for zram: keep an active swapping policy
vm.swappiness = 60
# optional: set to 100 if you want the system to lean on zram even more
# vm.swappiness = 100# apply the configuration
sudo sysctl --systemEarlyOOM to Prevent Full System Freezes
The earlyoom daemon can intervene before the system becomes completely unresponsive. With the right configuration, it can preferentially kill browser processes first, which is often the safest choice because browsers usually support session restore and tend to consume the most memory.
rfjakob/earlyoom: earlyoom - Early OOM Daemon for Linux
# install earlyoom
sudo pacman -S earlyoom

# enable it and start it immediately
sudo systemctl enable --now earlyoom

# configure the preferred kill policy
sudo nano /etc/default/earlyoom
Add:
# 1. trigger when free RAM or swap drops below 5%
# 2. always protect (--avoid):
#    - init and system bus: systemd, dbus
#    - display managers: sddm, gdm, lightdm
#    - display stack: Xorg, Xwayland
#    - desktop core processes: plasmashell, gnome-shell, kwin, niri, hyprland, sway
#    - package managers: pacman, pamac, yay, paru
#    - remote access: sshd
# 3. prefer killing (--prefer): major browsers
EARLYOOM_ARGS="-m 5 -s 5 -r 60 --avoid '^(init|systemd.*|dbus.*|sddm.*|gdm.*|lightdm.*|Xorg|Xwayland|kwin_.*|plasmashell|gnome-shell|gnome-session.*|niri|sway|hyprland|pacman|pamac.*|yay|paru|sshd)$' --prefer '^(firefox|chromium|chrome|brave|microsoft-edge-.*|vivaldi-bin|opera)$'"
Apply the changes:
# restart the earlyoom service
sudo systemctl restart earlyoom

# inspect the logs and confirm the regular expressions were loaded correctly
journalctl -u earlyoom -n 20
Rime Input Method: oh-my-rime / Rime Ice / Wanxiang and Models
# search for and install the Rime input method
paru -S fcitx5-rime
# create the Rime config directory
mkdir -p ~/.local/share/fcitx5/rime
# if you installed another setup before, clear it first
rm -rf ~/.local/share/fcitx5/rime/*
Right-click the input method icon in the system tray, choose Restart, then right-click again and choose Configure.
Click Add Input Method, add Rime, and remove Keyboard - Chinese.
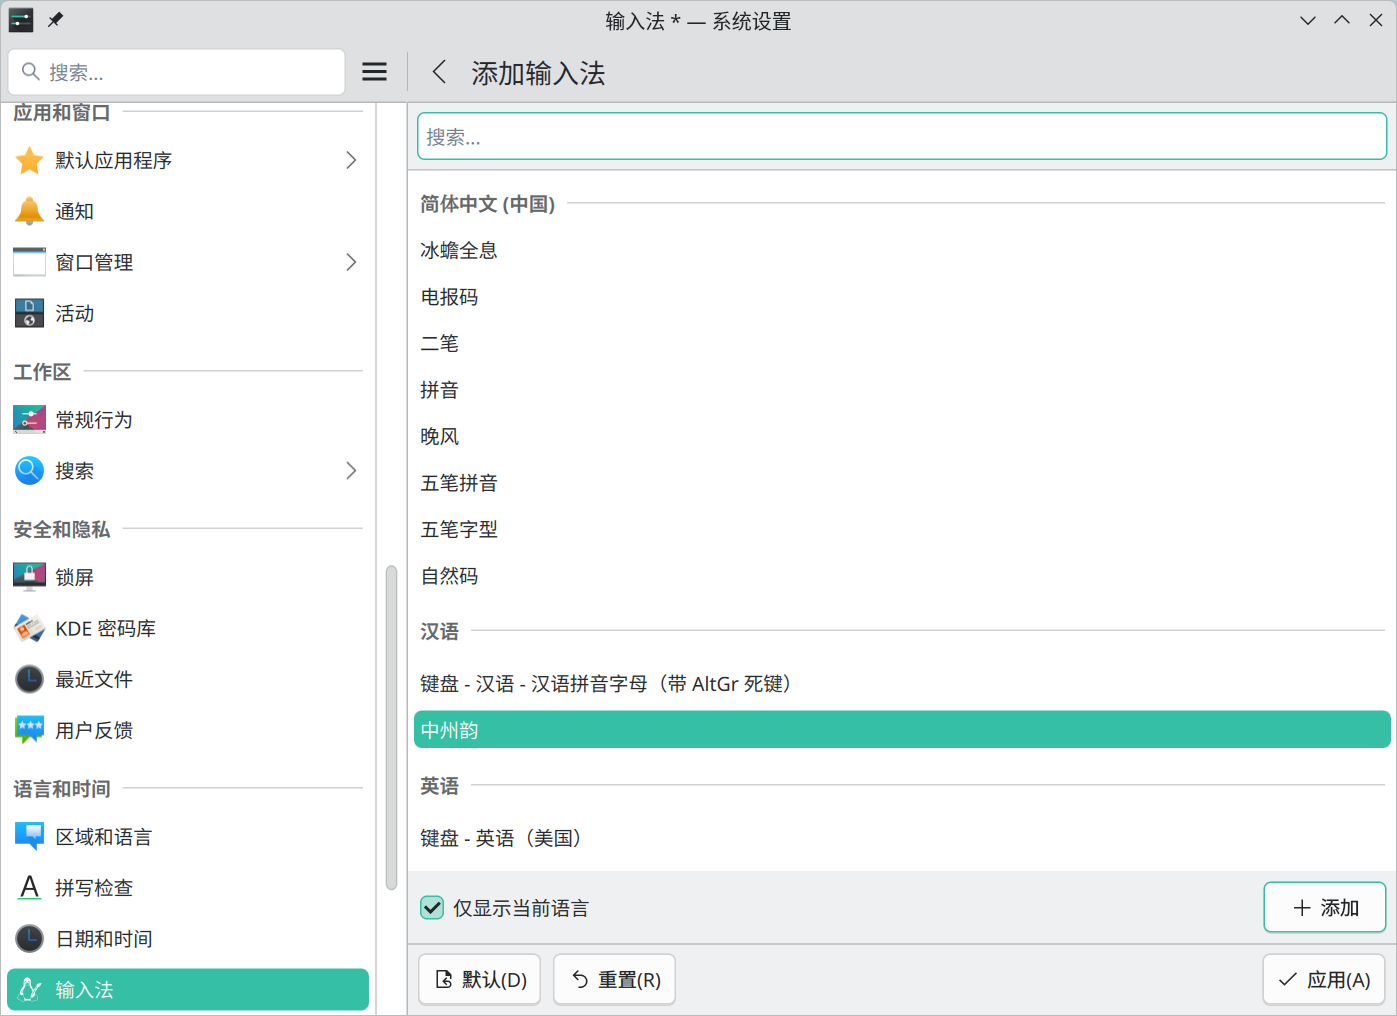
After changing the configuration, right-click the tray keyboard icon and choose Restart, or right-click the active input method name and choose Redeploy.
Option 1: oh-my-rime | Mint Input Method
# clone and install oh-my-rime
git clone --depth 1 https://github.com/Mintimate/oh-my-rime.git /tmp/oh-my-rime
# copy the scheme files into the Rime config directory
cp -r /tmp/oh-my-rime/* ~/.local/share/fcitx5/rime/
Input Method Scheme Configuration - Override and Customization | oh-my-rime
# configure the available schemes
$ nano ~/.local/share/fcitx5/rime/default.custom.yaml

patch:
  # the T9 layout depends on rime_mint; override this list if you need another scheme
  schema_list:
    # - schema: rime_mint             # Mint Pinyin
    - schema: double_pinyin_flypy     # Xiaohe double pinyin
    # - schema: rime_mint_flypy       # Mint Pinyin + Xiaohe mixed input
    # - schema: terra_pinyin          # Terra Pinyin customized by Mint
    # - schema: wubi98_mint           # Wubi 98
    # - schema: wubi86_jidian         # Wubi 86
    # - schema: t9                    # T9 full pinyin
    # the following schemes are supported by Mint but not enabled by default
    # - schema: double_pinyin_abc
    # - schema: double_pinyin_mspy
    # - schema: double_pinyin_sogou
    # - schema: double_pinyin_ziguang
    # - schema: double_pinyin
  # disable digit separator passthrough for comma, period, and colon
  punctuator/digit_separators: ""


# full pinyin uses rime_mint.custom.yaml; Xiaohe double pinyin uses double_pinyin_flypy.custom.yaml
$ nano ~/.local/share/fcitx5/rime/rime_mint.custom.yaml

patch:
  # number of candidates
  menu/page_size: 10
  # maximum pinyin string length (default: 25)
  codeLengthLimit_processor: 100
  # output punctuation directly in Chinese mode instead of showing it as a candidate
  "punctuator/half_shape/[": "【"
  "punctuator/half_shape/]": "】"
Option 2: Rime Ice + Wanxiang Grammar Model
# install a Rime Ice scheme
$ paru rime-ice

1 aur/rime-ice-double-pinyin-abc-git r845.0d85dd5-1 [+10 ~0.11]
    Rime Ice - long-maintained Simplified Chinese dictionary - Smart ABC double pinyin
2 aur/rime-ice-double-pinyin-flypy-git r845.0d85dd5-1 [+10 ~0.11]
    Rime Ice - long-maintained Simplified Chinese dictionary - Xiaohe double pinyin
3 aur/rime-ice-double-pinyin-git r845.0d85dd5-1 [+10 ~0.11]
    Rime Ice - long-maintained Simplified Chinese dictionary - Ziranma double pinyin
4 aur/rime-ice-double-pinyin-jiajia-git r845.0d85dd5-1 [+10 ~0.11]
    Rime Ice - long-maintained Simplified Chinese dictionary - JiaJia double pinyin
5 aur/rime-ice-double-pinyin-mspy-git r845.0d85dd5-1 [+10 ~0.11]
    Rime Ice - long-maintained Simplified Chinese dictionary - Microsoft double pinyin
6 aur/rime-ice-double-pinyin-sogou-git r845.0d85dd5-1 [+10 ~0.11]
    Rime Ice - long-maintained Simplified Chinese dictionary - Sogou double pinyin
7 aur/rime-ice-double-pinyin-ziguang-git r845.0d85dd5-1 [+10 ~0.11]
    Rime Ice - long-maintained Simplified Chinese dictionary - Ziguang double pinyin
8 aur/rime-ice-git r845.0d85dd5-1 [+10 ~0.11]
    Rime Ice - long-maintained Simplified Chinese dictionary
9 aur/rime-ice-pinyin-git r845.0d85dd5-1 [+10 ~0.11]
    Rime Ice - long-maintained Simplified Chinese dictionary - full pinyin
:: Packages to install (example: 1 2 3, 1-3):
Apply patches via patch - Rime Ice
Optionally download a Wanxiang grammar model: wanxiang-lts-zh-hans.gram or wanxiang-mini-zh-hans.gram.
# optionally place the Wanxiang model into the Rime config directory
$ mv ~/Downloads/wanxiang-lts-zh-hans.gram ~/.local/share/fcitx5/rime/
# create a global patch
$ nano ~/.local/share/fcitx5/rime/default.custom.yaml

patch:
  # import the rime_ice_suggestion.yaml config
  __include: rime_ice_suggestion:/
  # number of candidates
  menu/page_size: 10
  # key bindings
  key_binder:
    bindings:
      # use comma for the previous page of candidates
      - { when: composing, accept: comma, send: Page_Up }
      # use period for the next page of candidates
      - { when: composing, accept: period, send: Page_Down }
  # optional grammar model settings for Wanxiang
  grammar:
    language: wanxiang-lts-zh-hans
    collocation_max_length: 8
    collocation_min_length: 2
    collocation_penalty: -10
    non_collocation_penalty: -5
    weak_collocation_penalty: -100
    rear_penalty: -5
  translator/contextual_suggestions: false
  translator/max_homophones: 8
  translator/max_homographs: 8
  # disable digit separator passthrough for comma, period, and colon
  punctuator/digit_separators: ""
Option 3: Wanxiang Pinyin
Method 1:
Visit Releases · amzxyz/rime_wanxiang and download either the standard scheme or the enhanced double-pinyin auxiliary-code scheme.
# extract it into the Rime config directory
unzip rime-wanxiang-flypy-fuzhu.zip -d ~/.local/share/fcitx5/rime
Method 2:
Temporarily enable the ArchLinuxCN repository as described in the system configuration document.
# basic edition package naming: rime-wanxiang-[scheme-name]
$ paru rime-wanxiang-flypy
# enhanced edition package naming: rime-wanxiang-pro-[scheme-name]
$ paru rime-wanxiang-pro-flypy
Then visit Releases · amzxyz/rime_wanxiang and download the grammar model.
# move it into the Rime config directory
mv ~/Downloads/wanxiang-lts-zh-hans.gram ~/.local/share/fcitx5/rime/
rime_wanxiang/README.md at wanxiang · amzxyz/rime_wanxiang
Rime Wanxiang beginner installation guide
# use wanxiang.custom.yaml for the basic edition and wanxiang_pro.custom.yaml for the enhanced edition
$ cp ~/.local/share/fcitx5/rime/custom/wanxiang_pro.custom.yaml ~/.local/share/fcitx5/rime
# switch from direct auxiliary codes to indirect auxiliary codes, otherwise pinyin may be consumed as an auxiliary code when picking single characters
$ nano ~/.local/share/fcitx5/rime/wanxiang_pro.custom.yaml

patch:
  # whether to enable the user dictionary
  translator/enable_user_dict: true
  # allow complete sentences to enter the user dictionary
  translator/enable_sentence: true
  # whether to enable automatic word generation based on typing habits
  # this has no effect in Wanxiang Pro because it uses fixed word frequency
  translator/enable_encoder: true

  # hotkey for "apply auxiliary code automatically / lock current candidate"
  force_upper_aux/hotkey: "Tab"
  # use comma and period for paging
  key_binder/bindings/+:
    - { accept: comma, send: Page_Up, when: has_menu }
    - { accept: period, send: Page_Down, when: has_menu }

  speller/algebra:
    __patch:
      #- fuzzy initials/finals
      - wanxiang_algebra:/pro/小鹤双拼
      - wanxiang_algebra:/pro/间接辅助

  # ... your other settings omitted ...

  # number of candidates; 7/8/9/0 map to tones 1/2/3/4, so keep the page size at 6 or lower if that matters to you
  menu/page_size: 10
  # disable digit separator passthrough for comma, period, and colon
  punctuator/digit_separators: ""
Fonts
- shell
$ paru -S ttf-lxgw-wenkai 1 aur/ttf-lxgw-wenkai 1.521-1 [+9 ~0.16] An open-source Chinese font derived from Fontworks' Klee One. 2 aur/ttf-lxgw-wenkai-screen 1.520-1 [+3 ~0.00] Screen-optimized variant of LXGW WenKai. 3 aur/ttf-lxgw-wenkai-mono-nerd 1.521-1 [+1 ~0.16] LXGW WenKai Mono patched with Nerd Font glyphs 4 aur/ttf-lxgw-wenkai-nerd 1.521-1 [+1 ~0.16] LXGW WenKai patched with Nerd Font glyphs 5 aur/ttf-lxgw-wenkai-tc 1.520-1 [+1 ~0.00] Traditional Chinese version of LXGW WenKai 6 aur/ttf-lxgw-wenkai-tc-mono 1.520-1 [+1 ~0.00] Traditional Chinese mono version of LXGW WenKai 7 aur/ttf-lxgw-wenkai-gb 1.520-1 [+0 ~0.00] LXGW WenKai adjusted to the GB2312 standard 8 aur/ttf-lxgw-wenkai-lite 1.521-1 [+0 ~0.00] LXGW WenKai Lite 9 aur/ttf-lxgw-wenkai-mono-lite 1.521-1 [+0 ~0.00] LXGW WenKai Mono Lite :: Packages to install (example: 1 2 3, 1-3): :: 2 - shell
$ paru -S ttf-lxgw-neo-xihei 1 aur/ttf-lxgw-neo-xihei 1.225-1 [+3 ~0.00] LXGW Neo XiHei, a Simplified Chinese sans-serif font derived from IPAex Gothic 2 aur/ttf-lxgw-neo-xihei-screen 25.10.22-1 [+3 ~0.00] Screen-optimized edition of LXGW Neo XiHei 3 aur/ttf-lxgw-neo-xihei-plus 1.225-1 [+2 ~0.03] Extended edition with full CJK Extension A support 4 aur/ttf-lxgw-neo-xihei-screen-full 25.12.07-1 [+2 ~0.00] Screen edition with wider glyph coverage :: Packages to install (example: 1 2 3, 1-3): :: 4 - shell
$ paru -S ttf-lxgw-neo-zhisong 1 aur/ttf-lxgw-neo-zhisong 1.050-1 [+0 ~0.00] A Chinese serif font derived from IPAmj Mincho 2 aur/ttf-lxgw-neo-zhisong-screen 25.12.07-1 [+0 ~0.00] Screen edition of LXGW Neo ZhiSong 3 aur/ttf-lxgw-neo-zhisong-screen-full 25.12.07-1 [+0 ~0.00] Full screen edition of LXGW Neo ZhiSong :: Packages to install (example: 1 2 3, 1-3): :: 3 Note: this package is huge because it includes full Simplified Chinese, Traditional Chinese, Japanese, and Korean coverage, multiple weights and styles, plus a complete Nerd Font icon set.
shellparu -S ttf-sarasa-gothic-nerd-fonts- shell
sudo pacman -S wqy-microhei - shell
# install through ArchLinuxCN sudo pacman -S ttf-maplemono-nf-cn-unhinted - shell
paru -S otf-myna
tmux
tmux is a terminal multiplexer. It lets you switch between multiple programs in a single terminal, detach them so they keep running in the background, and reattach them later from another terminal.

sudo pacman -S tmuxNushell
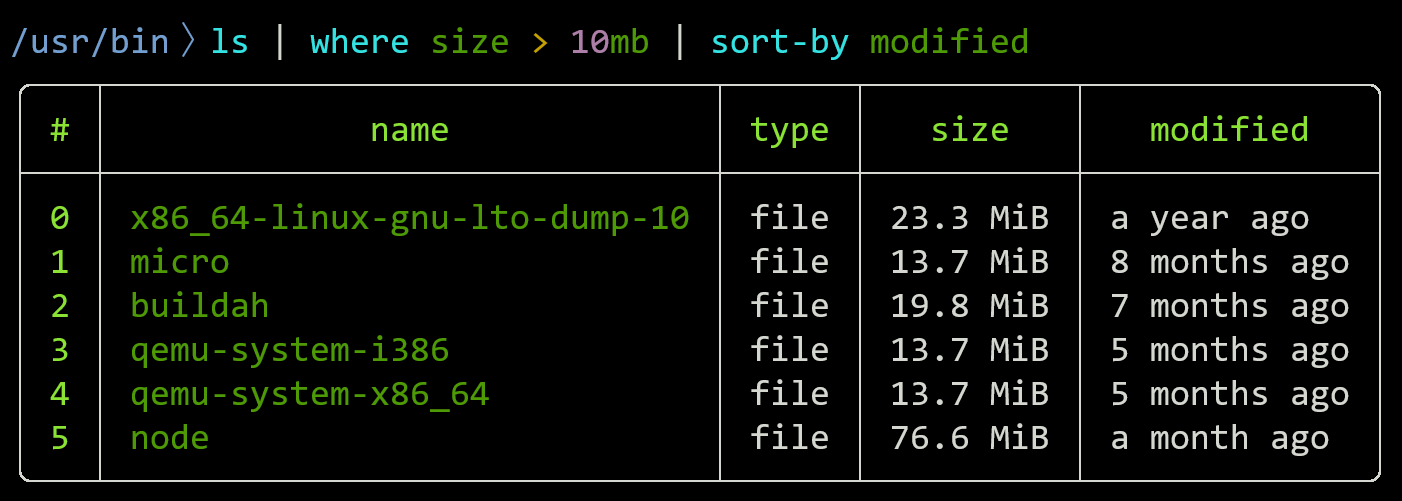
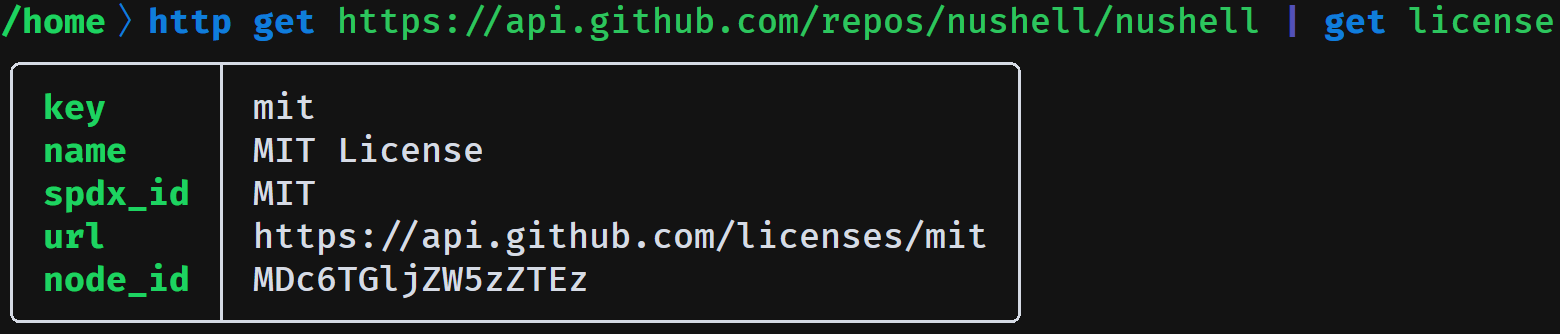
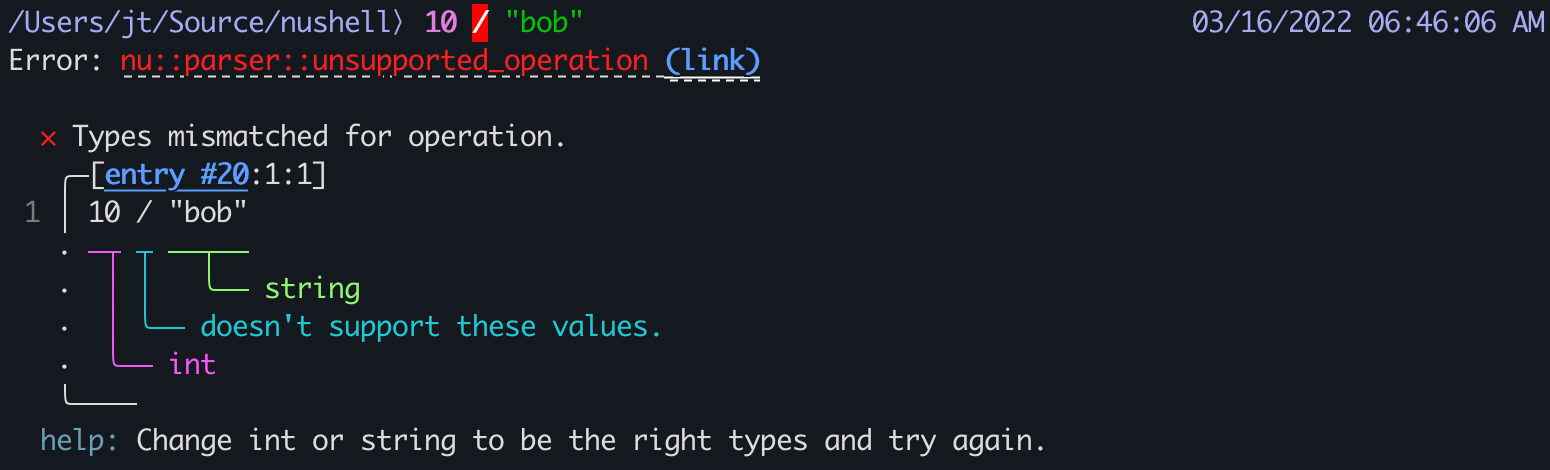
Nushell is a new kind of shell.
- Control any system with pipelines: Nu works on Linux, macOS, BSD, and Windows.
- Everything is data: Nu pipelines use structured data, making selection, filtering, and sorting safer and easier.
- Strong plugin system: Nu is easy to extend.
sudo pacman -S nushellfzf Command-Line Fuzzy Finder
# install fzf
$ sudo pacman -S fzf

# append the following to the end of the file
$ kate ~/.zshrc

# enable the Zsh plugin and key bindings for fzf
[ -f /usr/share/fzf/key-bindings.zsh ] && source /usr/share/fzf/key-bindings.zsh
[ -f /usr/share/fzf/completion.zsh ] && source /usr/share/fzf/completion.zsh

$ source ~/.zshrc
zoxide Smart cd
zoxide is a smarter cd command inspired by z and autojump. It remembers the directories you use most often so you can jump back to them with only a few keystrokes.
Fuzzy jumping with zoxide requires fzf.

Installation - ajeetdsouza/zoxide
# install zoxide
sudo pacman -S zoxide- Zsh initializationshell
# append the following to the end of the file $ kate ~/.zshrc # zoxide eval "$(zoxide init zsh)" $ source ~/.zshrc - Nushell initializationshell
zoxide init nushell | save -f ~/.zoxide.nu
source ~/.zoxide.nu
Examples:
# exact jump the first time
z ~/workspaces/my

# fuzzy jump afterwards
z work
z my
z wo my
debtap
A script for converting .deb packages into Arch Linux packages with a strong focus on correctness.
# install debtap
$ paru -S debtap

# initialize the debtap database
$ sudo debtap -u

cat: /var/cache/debtap/base-packages: No such file or directory
sort: cannot read: /var/cache/debtap/extended-base-packages-list-temp: No such file or directory

# on Manjaro, create the required cache directory and temp files first
$ sudo install -d -m755 /var/cache/debtap
$ sudo touch /var/cache/debtap/base-packages /var/cache/debtap/extended-base-packages-list-temp

# initialize again
$ sudo debtap -u
deepin-wine8/10-stable + spark-dwine-helper
spark-dwine-helper patches and enhances deepin-wine to improve the overall experience, and some AUR packages depend on it.
cd ~/.cache
paru -G deepin-wine8-stable
cd deepin-wine8-stable
nano PKGBUILD
Edit _pkgver, source, and sha256sums in deepin-wine8-stable/PKGBUILD:
_pkgver=8.16deepin41_spark1

source=(
    "https://mirrors.sdu.edu.cn/spark-store/amd64-store/depends/deepin-wine8/deepin-wine8-stable_${_pkgver}_amd64.deb"
)

sha256sums=('SKIP')# build and install deepin-wine8-stable
makepkg -si
# install deepin-wine10-stable
paru -S deepin-wine10-stable
# install spark-dwine-helper
paru -S spark-dwine-helperSpark Store
$ paru -S amber-ce-bookworm

==> Retrieving sources...
  -> Found amber-ce-bookworm-12.7.5.tar.gz
==> Validating source files with sha256sums...
    amber-ce-bookworm-12.7.5.tar.gz ... FAILED
==> ERROR: One or more files did not pass the validity check!
error: failed to download sources for 'amber-ce-bookworm-12.7.5-1'
error: packages failed to build: amber-ce-bookworm-12.7.5-1
Gitee now enforces additional bot verification, so you need to download the archive manually from Amber CE/amber-ce-bookworm - Gitee.com.
# move the downloaded file into the AUR build directory
cd ~/.cache/paru/clone/amber-ce-bookworm
mv -f ~/Downloads/.hmcl/amber-ce-bookworm-12.7.5.tar.gz ./

# rebuild and install
makepkg -si
You can ignore the error Can not determine NVIDIA Driver version if your machine does not use an NVIDIA GPU. Reboot after installation.
Download the DEB from Download Spark Store.
Search for ACE Bookworm Compatibility Environment in the application menu and open it:
sudo apt update
sudo apt install ./spark-store_4.8.2_amd64.deb
Microsoft Edge
Microsoft's Chromium-based browser.

Official Microsoft Edge Download
paru -S microsoft-edge-stable-binSearch for Default Applications in the launcher if you want to change the default web browser.
Google Chrome
paru -S google-chromeTor Browser
Tor Browser is an open-source browser focused on privacy. It uses layered encryption and a relay network to let you browse anonymously while hiding your identity and location.
# if paru -S tor-browser-bin fails to import the key, import it manually first
curl -s https://keys.openpgp.org/vks/v1/by-fingerprint/EF6E286DDA85EA2A4BA7DE684E2C6E8793298290 | gpg --import
paru -S tor-browser-bin